Welcome to a journey of joyful absurdity! This manual unlocks the secrets to clowning, fostering creativity and connection through playful, heartfelt performance artistry․
What is “Down the Clown”?
“Down the Clown” isn’t simply about donning a costume; it’s a philosophy, a methodology for unlocking your innate comedic potential․ Developed by renowned clown teacher David Shiner, it’s a rigorous training system focused on finding the clown within you․

This approach emphasizes self-discovery through playful experimentation, rather than relying on pre-defined gags or characters․ It encourages performers to embrace failure, vulnerability, and the beauty of imperfection․ The core principle revolves around “game playing” – establishing simple, repeatable actions and then deliberately attempting to disrupt them, observing the resulting comedic chaos․
Unlike traditional clowning which often focuses on a specific persona, “Down the Clown” prioritizes the process of discovery․ It’s about reacting truthfully in the moment, allowing the clown to emerge organically from your own physicality and emotional life․ It’s a pathway to authentic, deeply engaging performance, fostering a unique and personal clown character․
The Allure of Clown Performance
Why clowning? In a world often demanding perfection, the clown offers a refreshing antidote – permission to be delightfully, unapologetically flawed․ This vulnerability is profoundly connecting; audiences recognize themselves in the clown’s struggles and triumphs․
Clown performance transcends language barriers, communicating through universal physical comedy and emotional honesty․ It’s a direct line to the audience’s heart, bypassing intellectual analysis and tapping into pure, unadulterated joy․ The clown’s silliness isn’t merely frivolous; it’s a powerful tool for social commentary and emotional exploration․
Furthermore, the discipline of clowning cultivates presence, spontaneity, and a heightened awareness of self and surroundings․ It’s a practice in living fully in the moment, responding authentically to whatever arises․ This fosters resilience, creativity, and a deeper connection to the human experience, making it rewarding for both performer and spectator․

Part 1: The Clown Character
Now, let’s delve into crafting your clown! This section explores persona development, essential costuming, and the magical tools that bring your character to life․

Developing Your Clown Persona
Creating a compelling clown persona is the cornerstone of your performance․ Begin by exploring archetypes – the innocent, the trickster, the auguste, the whiteface – but don’t feel limited by them! Consider your own natural inclinations; are you naturally clumsy, overly enthusiastic, or quietly observant?
Think about your clown’s backstory․ Where did they come from? What are their dreams and fears? This internal life, even if never explicitly stated, will inform their actions and reactions․ Give your clown a unique name and a defining characteristic – a peculiar walk, a signature gesture, or a catchphrase․
Experiment with different emotions and reactions․ How does your clown respond to joy, sadness, anger, or frustration? Exaggerate these emotions for comedic effect, but always ground them in genuine feeling․ The most successful clown personas are those that feel both familiar and surprising, relatable and utterly unique․ Don’t be afraid to be vulnerable and embrace imperfection!
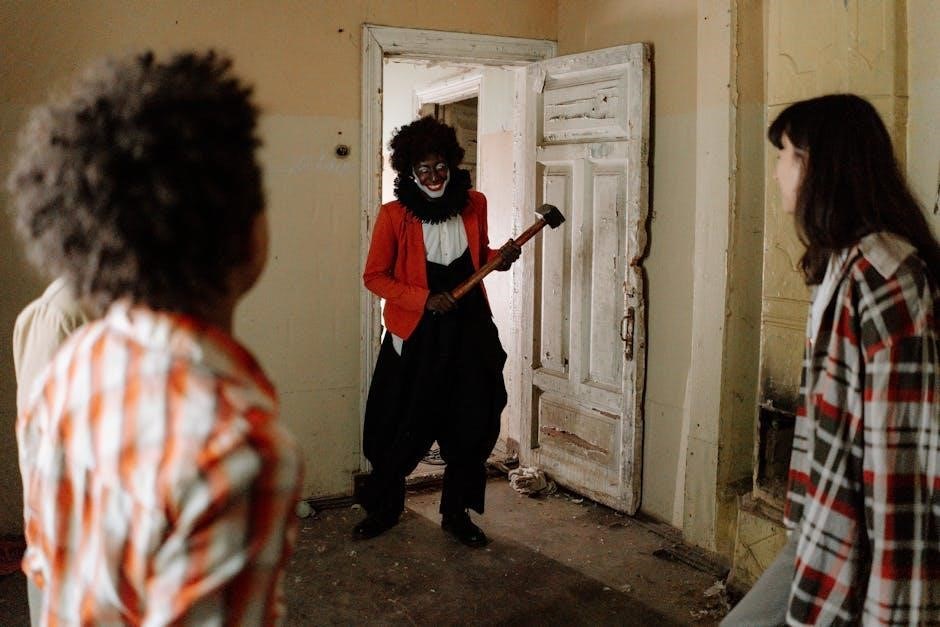
Costume & Makeup Essentials
Your costume and makeup are vital tools in establishing your clown persona․ Think beyond the stereotypical oversized shoes and bright colors – though those can certainly work! Consider how clothing can exaggerate your clown’s physicality; baggy pants emphasize clumsiness, a tight vest highlights a puffed-out chest․
Makeup is transformative․ Whiteface provides a blank canvas for expression, while Auguste makeup uses reds, pinks, and browns to create a more mischievous look․ Practice layering colors and creating exaggerated features – large noses, oversized mouths, and expressive eyebrows․ Water-based makeup is generally preferred for its ease of removal and breathability․
Prioritize comfort and practicality․ You’ll be moving a lot, so ensure your costume allows for a full range of motion․ Avoid anything too restrictive or easily damaged․ Test your makeup for durability and sweat resistance․ Remember, the goal is to enhance your performance, not hinder it!
Props: The Clown’s Toolkit
Props are extensions of your clown’s personality, sparking gags and enhancing storytelling․ A simple rubber chicken, a squirting flower, or a ridiculously oversized pair of glasses can become comedic gold in the right hands․
Consider the “rule of three” – a gag is often funnier when repeated with a slight variation a third time․ Props facilitate this beautifully․ Think about everyday objects used in unexpected ways: a bucket, a rope, a hat․ The more mundane the object, the greater the comedic potential․
Safety is paramount․ Ensure props are durable and won’t break mid-performance, causing injury․ Avoid anything sharp or potentially hazardous․ Practice handling your props until you’re completely comfortable with them․ A well-chosen prop isn’t just funny; it’s a reliable partner in your comedic journey․

Part 2: Core Clown Skills
Mastering physicality, voice, and improvisation are crucial․ These foundational skills empower you to connect with audiences and build genuinely hilarious clown performances․
Physical Comedy Fundamentals
Physical comedy is the heart of many clown performances, relying on exaggerated movements, precise timing, and a willingness to embrace failure․ Begin with exploring your body’s natural range of motion – how far can you stretch, how quickly can you react? Practice falling safely, learning to “sell” the fall with commitment and comedic timing․
Consider the principles of opposition – contrasting movements (e․g․, a delicate gesture followed by a clumsy stumble) – and repetition – repeating a movement with increasing absurdity․ Explore different gaits: the waddle, the strut, the tiptoe․
Facial expressions are paramount․ Practice exaggerated smiles, surprised looks, and expressions of confusion․ Remember to react physically to everything, even imagined stimuli․ Don’t be afraid to use your whole body to tell a story․ Observe classic silent film comedians for inspiration, paying attention to their use of space and physicality․ The key is commitment and finding the humor in the unexpected․
Vocal Techniques for Clowns
A clown’s voice is a powerful tool, extending beyond simple speech to encompass a range of sounds and expressions․ Explore vocal textures – squeaks, groans, whispers, and booming pronouncements․ Practice altering your pitch and pace dramatically for comedic effect․ Don’t underestimate the power of silence; a well-timed pause can be as funny as a perfectly delivered line․
Develop a signature vocal tic or catchphrase․ Experiment with different accents and dialects, but avoid stereotypes․ Learn to project your voice without shouting, ensuring clarity for the audience․ Vocal playfulness is key – try mimicking animal sounds, musical instruments, or everyday objects․
Consider incorporating nonsense syllables and invented languages․ A clown’s voice should be expressive and adaptable, reflecting their character’s emotions and intentions․ Record yourself practicing and listen back critically, focusing on clarity, timing, and comedic impact․ Remember, vocal variety keeps the audience engaged!
Improvisation & Audience Interaction
The heart of clowning lies in spontaneous interaction․ Embrace “yes, and…” – accepting offers from the audience and building upon them․ Active listening is crucial; truly hear what audience members say and react authentically․ Don’t be afraid to fail; mistakes are often the funniest moments!
Develop a playful curiosity․ Ask open-ended questions that invite participation․ Be comfortable with silence and allow moments to breathe․ Learn to read the audience’s energy and adjust your performance accordingly․ Acknowledge and incorporate audience reactions into your act․
Practice games that build improvisational skills, like mirroring or object work․ Remember, the audience isn’t there to watch a performance, but to play with you․ Stay present, be generous, and trust your instincts․ Genuine connection creates the most memorable clown experiences․

Part 3: Building a Routine
Now, let’s construct a captivating act! We’ll explore structuring gags, crafting comedic timing, and preparing for the delightful chaos of live performance․
Gags & Bits: A Clown’s Repertoire
A clown’s success hinges on a well-stocked collection of gags and bits – short, repeatable comedic sequences․ These aren’t just jokes; they’re physical scenarios, visual puzzles, and opportunities for playful failure․ Think pratfalls, silly walks, exaggerated reactions, and unexpected object interactions․
Start simple! A classic gag might involve struggling with a too-small prop, attempting a seemingly easy task with disastrous results, or misinterpreting a simple instruction․ Bits can be slightly longer, building on a central comedic idea․ For example, a bit could involve a clown repeatedly trying to inflate a balloon that keeps deflating;
Collect ideas everywhere! Observe everyday life, watch classic clown performances, and brainstorm relentlessly․ Keep a notebook dedicated to gags – sketches, descriptions, and potential variations․ Don’t be afraid to steal (and then personalize!) ideas․ The key is to make them your own, infused with your unique clown persona․ Remember, repetition with variation is your friend!
Structuring a Short Clown Act
A successful short act, typically 3-5 minutes, needs a clear beginning, middle, and end․ Start with an “entrance” – a way to establish your clown character and grab the audience’s attention․ This could be a silly walk, a dramatic stumble, or a playful interaction with the space․
The middle should build on this introduction, showcasing a series of gags and bits․ Aim for a rhythm of escalating comedic moments, punctuated by pauses for audience reaction․ Introduce a simple “problem” or “goal” for your clown to pursue, creating a narrative thread, even if absurd․
Finally, the “exit” provides closure․ This isn’t necessarily a grand finale, but a satisfying resolution (or hilarious failure!) to the clown’s pursuit․ Leave the audience with a lasting impression – a final gag, a heartfelt moment, or a playful wave goodbye․ Practice transitions between bits to maintain momentum and flow․
Dealing with Hecklers & Unexpected Situations
Hecklers are inevitable; view them as opportunities for improvisation! Don’t engage in argument․ Acknowledge the interruption with a confused look, exaggerated reaction, or redirect the comment back at them playfully․ Remember, the clown is often the butt of the joke․
Unexpected situations – dropped props, technical glitches, or accidental mishaps – are gold! Embrace them․ Acknowledge the mistake with physical comedy and turn it into a bit․ The audience appreciates authenticity and a clown’s ability to recover․
Maintain character․ No matter what happens, stay true to your clown persona․ This provides a consistent comedic framework․ A simple “yes, and…” approach to unexpected events can unlock hilarious possibilities․ Above all, remember to breathe and enjoy the chaos!

Part 4: Beyond the Basics
Expand your horizons! Explore specialized clowning forms and prioritize safety, continually refining your skills through workshops and dedicated practice for growth․
Clown Types & Specializations
The world of clowning is wonderfully diverse, extending far beyond the traditional big-shoe, red-nose archetype․ Understanding these specializations can help you define your clown persona and refine your performance style․ Consider the Auguste, the classic “funny” clown, often clumsy and mischievous, relying on slapstick and playful failure․ Then there’s the Whiteface clown, elegant and sophisticated, often the “straight man” to the Auguste’s antics, showcasing precision and skill․
Character clowns, like Tramps or Hobos, tell stories through physicality and poignant expressions․ Musical clowns integrate music into their routines, utilizing instruments or vocal performance․ New Clowns, a more recent development, often deconstruct traditional clowning, embracing vulnerability and abstract performance․ You might also explore hospital clowns, bringing joy to patients, or political clowns, using satire to comment on social issues․ Finding your niche allows for focused development and a unique contribution to the art form․ Experimentation is key!
Safety Considerations for Clown Performance
Prioritizing safety is paramount in clowning, for both yourself and your audience․ Physical safety demands careful consideration of your performance space – clear it of obstacles and ensure adequate lighting․ Practice stunts and falls in a controlled environment before performing them publicly, and always have a spotter when necessary․ Be mindful of your physical limitations and avoid pushing yourself beyond your capabilities․
Audience interaction requires sensitivity and respect․ Always obtain consent before physical contact, and be aware of personal boundaries․ Avoid actions that could be perceived as threatening or harmful․ Prop safety is also crucial; inspect props regularly for damage and ensure they are used responsibly․ Finally, be aware of potential allergies when using makeup or other materials․ A safe performance is a joyful performance, fostering trust and allowing for genuine connection with your audience․
Resources for Continuing Education

The journey of a clown is one of continuous learning and refinement․ Numerous resources exist to support your growth․ Consider workshops offered by organizations like Clowns Without Borders or local theatre groups specializing in physical comedy․ Online platforms such as Skillshare and Udemy host courses on improvisation, mime, and character development․
Books by masters like Jacques Lecoq and Viola Spolin provide invaluable insights into the principles of clowning and performance․ Attending clown festivals – like the International Clown Festival – offers opportunities to observe diverse styles and network with fellow performers․ Don’t underestimate the power of self-study: record your performances, seek feedback, and experiment relentlessly․ Remember, the most valuable resource is your own playful exploration and dedication to the art form․ Embrace the ongoing process of discovery!