Discover thoughtful gifts that simplify daily life, from practical tools to personalized items, helping recipients save time and effort while bringing joy to their routines.
1.1 Understanding the Concept of Everyday Shortcuts
Everyday shortcuts are tools, habits, or items that simplify routine tasks, saving time and effort. They are designed to make life easier, whether it’s through practical gadgets, efficient organizers, or thoughtful gifts. These shortcuts often become indispensable, blending seamlessly into daily routines. For instance, an eyewear stand or minimalist bowls can bring unexpected joy and functionality. The concept revolves around identifying small, impactful changes that enhance productivity and comfort, making them ideal for gifting. By focusing on utility and personalization, everyday shortcuts offer meaningful solutions for modern living.
1.2 Importance of Practical Gifting
Practical gifting focuses on items that provide real value, solving everyday problems or enhancing routines. It ensures gifts are used frequently, avoiding clutter. Thoughtful, functional presents like multi-use gadgets or organizers show consideration. They address specific needs, making recipients feel understood. For example, a notebook or quality consumables are appreciated for their utility. This approach fosters meaningful connections, as gifts become integral to daily life. Practical gifting emphasizes sustainability and efficiency, aligning with modern preferences for simplicity and purpose.
1.3 How to Choose the Right Shortcut Gift
Choosing the right shortcut gift involves understanding the recipient’s lifestyle and needs. Consider their daily challenges and how a gift can simplify their routine. For instance, a multi-functional gadget or a practical organizer can address clutter or time management issues. Personalization adds value, such as a notebook for journaling or a set of reusable containers for meal prep. Focus on functionality and durability to ensure the gift is both useful and long-lasting. Aligning the gift with their preferences ensures it becomes a cherished, everyday essential rather than an unused item.

Tech and Productivity Shortcuts
Essential tools like keyboard shortcuts, productivity apps, and smart home devices streamline tasks, saving time and enhancing efficiency for a more organized and productive lifestyle.
2.1 Essential Keyboard Shortcuts for Daily Use
Mastering essential keyboard shortcuts can significantly boost productivity. Common shortcuts like Ctrl+C (copy) and Ctrl+V (paste) simplify tasks, while Ctrl+Z (undo) and Ctrl+A (select all) save time. For multitasking, Ctrl+Tab switches between open windows, and Ctrl+S ensures work is saved. These shortcuts reduce mouse dependency, streamline workflows, and enhance efficiency. Whether for work or personal use, learning these shortcuts is a practical skill that minimizes errors and maximizes output. They are indispensable tools for anyone aiming to optimize their daily computing experience and stay organized in a fast-paced world.
2.2 Must-Have Productivity Apps for Streamlining Tasks
Enhance efficiency with productivity apps designed to simplify daily tasks. Todoist and Trello help organize tasks and projects, while Grammarly ensures clear communication. Evernote is perfect for note-taking, and RescueTime tracks productivity. These apps streamline workflows, reduce distractions, and save time. They are ideal for remote workers, students, and anyone seeking to optimize their routine. By gifting these tools, you empower others to manage their time effectively and stay focused on their goals, making them thoughtful and practical presents for everyday use.
2.3 Smart Home Devices for Simplified Living
Smart home devices offer convenient solutions for everyday tasks, enhancing comfort and efficiency. Amazon Echo Dot and Google Nest enable voice control for routines, while Philips Hue smart lights adjust settings effortlessly. Smart plugs and thermostats automate household functions, saving time and energy. These devices integrate seamlessly, allowing users to manage their homes remotely. They are perfect for busy individuals seeking to streamline their lives, making them thoughtful gifts that promote a modern, simplified lifestyle.
Personal Organization and Time Management
Enhance productivity with tools like planners, calendars, and desk organizers. These essentials help streamline tasks, reduce clutter, and promote consistency, making daily life more efficient and manageable.
3.1 Best Planners and Calendars for Daily Use
Planners and calendars are indispensable for organizing tasks and managing time effectively. Opt for a daily or weekly planner with space for goal-setting and to-do lists. Digital calendars offer reminders and syncing capabilities, while physical ones provide a tactile experience. Choose designs that suit individual preferences, from minimalist layouts to colorful themes. Pair with a habit tracker for added consistency. These tools help reduce stress, enhance productivity, and keep life on track. Thoughtful additions like stickers or motivational quotes can make them even more special, ensuring they become a cherished part of daily routines.
3.2 Desk Organizers for a Clutter-Free Workspace
Desk organizers are essential for maintaining a tidy and efficient workspace. They help keep essentials like pens, papers, and tech accessories within easy reach. Opt for multi-compartment trays or adjustable dividers to cater to different needs. Wireless charging pads and built-in USB hubs add functionality. Choose materials that align with personal style, from sleek metal to eco-friendly bamboo. A well-organized desk not only boosts productivity but also reduces stress. Consider pairing with a fun mousepad or a small plant for a personalized touch that enhances both functionality and aesthetics, making it a thoughtful gift for anyone seeking a clutter-free environment.
3.3 Habit Trackers for Consistency and Growth
Habit trackers are thoughtful gifts that empower individuals to build consistency and achieve personal growth. Whether it’s a sleek journal or a digital app, these tools help users monitor daily routines, set goals, and celebrate progress. For those who prefer a hands-on approach, bullet journals or planners with customizable layouts are ideal. Digital options, like habit-tracking apps, offer reminders and analytics for a data-driven experience. Pairing a tracker with a nice pen or a motivational note adds a personal touch. These gifts encourage mindfulness, productivity, and long-term self-improvement, making them a meaningful addition to any daily routine.

Kitchen and Cooking Shortcuts
Transform your kitchen with multi-functional gadgets, meal prep tools, and smart appliances that simplify cooking tasks and enhance efficiency for home chefs and busy cooks alike.
4.1 Multi-Functional Kitchen Gadgets
Multi-functional kitchen gadgets are perfect for streamlining cooking tasks, offering versatility and convenience. From spiralizers to food choppers, these tools simplify meal prep and reduce clutter. A versatile kitchen gadget like a 3-in-1 cooker or an electric kettle with multiple settings can be a game-changer for home cooks. These gadgets not only save time but also enhance creativity in the kitchen. They are ideal for both novice cooks and culinary enthusiasts, making them thoughtful gifts for anyone looking to elevate their cooking experience without sacrificing space or efficiency.

4.2 Meal Prep Containers and Tools
Meal prep containers and tools are essential for organizing and streamlining food preparation. Airtight, stackable containers keep meals fresh and portioned, while reusable dividers and bags offer versatility. Microwave-safe options and leak-proof designs make them ideal for on-the-go use. These tools not only save time but also help maintain a healthy lifestyle by encouraging planned meals. Practical and durable, they are perfect for busy individuals seeking to enhance their meal prep routine without compromising convenience or efficiency.
4.3 Smart Appliances for Efficient Cooking
Smart appliances are revolutionizing kitchens by simplifying meal preparation and saving time. From Wi-Fi-enabled slow cookers to intelligent air fryers, these devices offer preset settings and app control for effortless cooking. Multi-functional pressure cookers and smart ovens with voice commands further streamline tasks. These appliances are designed to reduce effort while delivering perfectly cooked meals. Whether it’s healthy frying, precise temperature control, or hands-free operation, smart cooking gadgets are must-haves for modern home chefs, ensuring efficiency and convenience in everyday culinary routines.
Fashion and Beauty Shortcuts
Discover practical yet stylish gifts that simplify beauty routines and enhance personal style, from multi-use products to chic accessories, perfect for everyday convenience and travel.
5.1 Time-Saving Beauty Products
Time-saving beauty products are perfect for simplifying routines. Multi-use makeup items, like tinted moisturizers with SPF, reduce the need for multiple steps. Travel-sized essentials, such as mini skincare sets, are ideal for on-the-go touch-ups. Automated beauty tools, like rotating makeup brushes, streamline application. Subscription services for replenishing favorites ensure you never run out. Practical gifts like these not only save time but also enhance daily beauty regimens, making them thoughtful additions to any gift guide focused on everyday shortcuts.
5.2 Stylish yet Practical Fashion Accessories
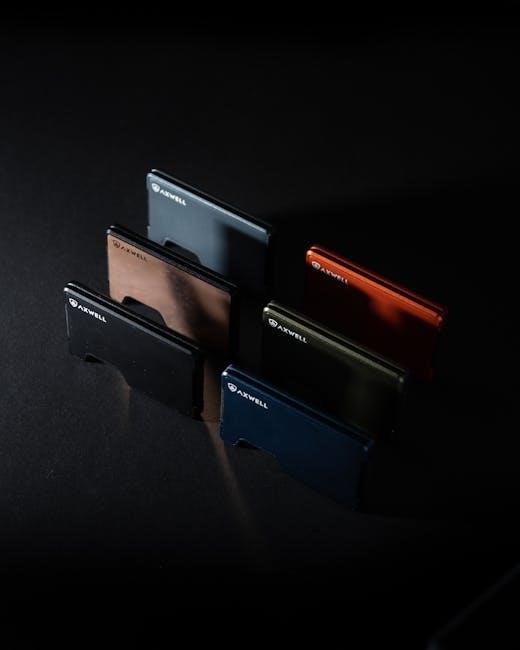
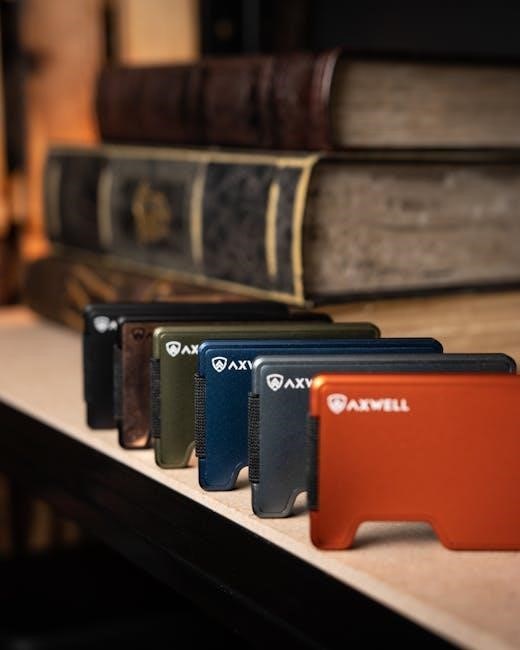
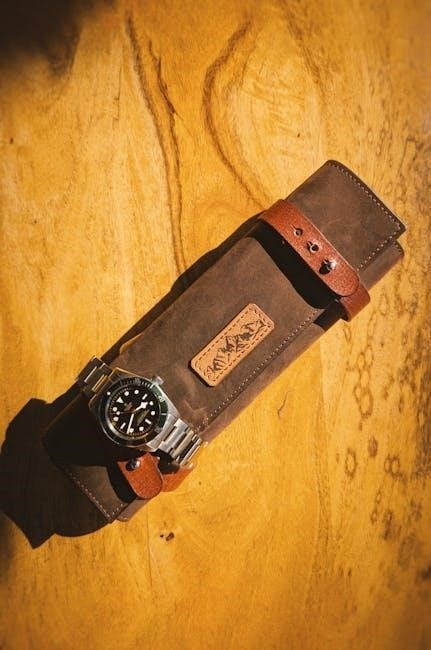
Stylish yet practical fashion accessories are perfect for everyday shortcuts. A chic scarf can double as a blanket or bag accessory, while a versatile crossbody bag offers hands-free convenience. Minimalist jewelry, like a simple watch, adds elegance without fuss. Reversible belts and multi-way bags provide versatility, while phone wallets combine style and functionality. These gifts blend fashion with practicality, ensuring they become everyday essentials. They simplify routines while keeping the wearer looking polished, making them ideal for those seeking both style and efficiency in their daily lives.
5.3 Travel-Friendly Beauty Organizers
Travel-friendly beauty organizers are a must-have for frequent travelers, offering a practical way to keep essentials tidy and accessible. Compact cases with multiple compartments ensure makeup, skincare, and tools stay organized. Lightweight, portable designs make them easy to pack, while stylish finishes add a touch of elegance. These organizers are perfect for simplifying beauty routines on the go, ensuring everything is within reach. They combine functionality with fashion, making them an ideal gift for anyone who values convenience and style while traveling. A thoughtful present for those who cherish both practicality and a polished look.

Home and Cleaning Shortcuts
Innovative storage solutions, cleaning hacks, and eco-friendly tools simplify home maintenance, offering practical gifts that enhance organization and efficiency for a cleaner, healthier living space effortlessly.
6.1 Innovative Storage Solutions
Innovative storage solutions are perfect for simplifying spaces and enhancing organization. Modular containers, stackable shelves, and over-the-door organizers offer practical ways to declutter and optimize storage. These gifts are ideal for anyone looking to streamline their home or office. Consider items like adjustable drawer dividers or collapsible bins that adapt to various needs. For a thoughtful touch, pair storage solutions with personalized labels or decorative accents. These gifts not only improve functionality but also add a touch of style, making them a versatile and appreciated choice for everyday shortcuts in home organization.
6.2 Cleaning Hacks and Tools
Cleaning hacks and tools are essential for maintaining a tidy and efficient home. Multi-functional cleaning products, such as all-purpose sprays or scrubbers, simplify tasks and reduce clutter. Microfiber cloths and reusable dusters are eco-friendly alternatives that make cleaning quicker. Consider gifting a cordless vacuum or a set of organizing caddies to streamline cleaning routines. These practical tools not only save time but also promote a cleaner, healthier living space. They are thoughtful gifts for anyone looking to enhance their daily cleaning shortcuts and maintain a spotless environment with minimal effort.
6.3 Air Quality and Odor Control Gadgets
Air quality and odor control gadgets are perfect for creating a fresh and comfortable living environment. Compact air purifiers remove allergens and pollutants, while essential oil diffusers add a pleasant scent. Odor-neutralizing sprays and automated deodorizers are great for kitchens and bathrooms. Smart sensors detect air quality issues, ensuring a healthier space. These gadgets are practical gifts that enhance daily life, promoting well-being and freshness. They are ideal for anyone looking to improve their home’s atmosphere without extra effort, making them thoughtful additions to your everyday shortcuts gift guide.
Fitness and Wellness Shortcuts
Enhance fitness routines with compact workout gear, recovery tools, and wearable tech. These gifts simplify health monitoring, post-workout care, and home exercises, promoting wellness effortlessly.
7.1 Compact Home Workout Equipment
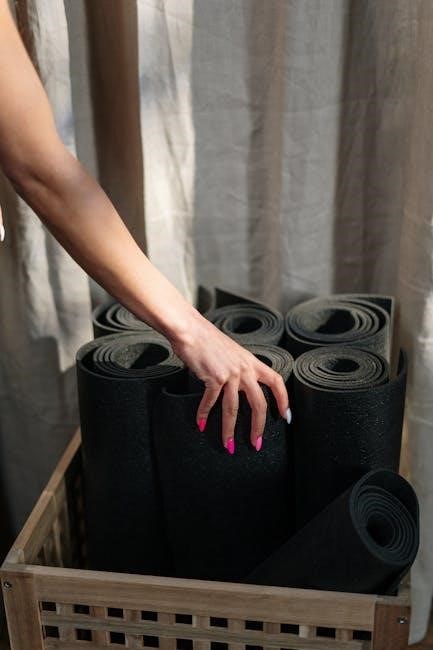
Compact home workout equipment offers space-saving solutions for fitness enthusiasts. Resistance bands, foldable yoga mats, and adjustable dumbbells are perfect for small spaces. These tools provide versatility, allowing for full-body workouts without bulky machinery. Portable designs make them ideal for travel, ensuring fitness routines remain uninterrupted. They are cost-effective and easy to store, making them a practical gift for anyone looking to maintain their wellness journey. These compact options simplify fitness, enabling efficient workouts in the comfort of home, and are a thoughtful gift for promoting health and convenience.
7.2 Recovery Tools for Post-Workout Care
Recovery tools are essential for post-workout care, helping to alleviate muscle tension and promote healing. Foam rollers, massage guns, and compression sleeves are popular choices for their effectiveness. These tools enhance blood flow, reduce soreness, and improve flexibility. Compact designs make them easy to use at home or on the go. They are ideal for fitness enthusiasts seeking to optimize their recovery routines. Gifting these practical items supports overall wellness and ensures a faster return to active lifestyles, making them thoughtful additions to any fitness-focused gift guide.
7.3 Wearable Tech for Health Monitoring
Wearable tech, like smartwatches and fitness trackers, offers a convenient way to monitor health metrics such as heart rate, sleep patterns, and daily activity. These devices provide real-time data, helping users stay informed about their wellness. Features like GPS tracking and water resistance make them versatile for various lifestyles. By syncing with apps, users can set goals and track progress, making these tools invaluable for fitness enthusiasts. As practical gifts, they empower individuals to take control of their health, making them ideal for those seeking to enhance their wellness journey with cutting-edge technology.
Travel and Commuting Shortcuts
Practical travel gifts like packing cubes, multi-use bags, and tech gadgets simplify journeys. Eco-friendly accessories and clever organizers ensure efficiency, making commutes and trips stress-free and enjoyable.
8.1 Packing Hacks and Essentials
Practical packing solutions like reusable cubes, multi-use bags, and compact organizers simplify travel prep. Tech gadgets such as portable chargers and travel adapters ensure convenience on the go. Eco-friendly accessories like collapsible water bottles and silicone storage bags promote sustainability while saving space. These essentials help streamline luggage, reduce clutter, and make commuting or traveling more efficient. Thoughtful gifts like these are perfect for frequent travelers, offering both functionality and style. They cater to diverse needs, ensuring every trip is stress-free and well-organized, making them ideal for anyone looking to enhance their travel experience with smart, everyday shortcuts.
8.2 Tech Gadgets for Travelers
Tech gadgets are essential for modern travelers, offering convenience and efficiency. Portable chargers and power banks ensure devices stay charged on the go, while travel adapters with built-in USB ports cater to global outlets. Noise-canceling headphones enhance comfort during long journeys, and smart luggage trackers provide peace of mind. Compact tech organizers keep cables tidy, and wearable devices like smartwatches monitor fitness and navigation. These gadgets are thoughtful gifts for frequent travelers, combining functionality with innovation to make every trip smoother and more enjoyable. They’re perfect for those who value practicality and staying connected on the move.
8.3 Eco-Friendly Travel Accessories
Eco-friendly travel accessories are perfect for conscious explorers, combining sustainability with practicality. Reusable water bottles, silicone storage bags, and bamboo toothbrushes reduce waste during trips. Biodegradable toiletries and packing cubes made from recycled materials are both functional and environmentally mindful. These gifts encourage travelers to minimize their footprint while staying organized. They’re ideal for adventurers who value the planet and efficiency, making every journey more sustainable and stress-free. Thoughtful and innovative, these accessories align with modern travelers’ needs for eco-conscious exploration.
Gift Ideas for Specific Interests
Curate gifts tailored to hobbies or professions, like tech gadgets for remote workers, cooking tools for foodies, or organizers for students, ensuring practicality and personalization.
9.1 Gifts for Remote Workers
Remote workers thrive with practical gifts that enhance productivity and comfort. Consider noise-canceling headphones for focus, portable chargers for seamless work on the go, or a sleek desk organizer to keep essentials within reach. A high-quality webcam or microphone ensures professional video calls, while a comfortable ergonomic mouse or keyboard reduces strain. Personalized items, like a monogrammed notebook or customized wall art, add a thoughtful touch. Subscription services for coffee or books also make great gifts, offering a break from the routine. Eco-friendly accessories, such as reusable water bottles or bamboo desk pads, align with sustainable values, making work-from-home life easier and more enjoyable.
9.2 Gifts for Students and Academics
Students and academics appreciate gifts that enhance productivity and organization. A high-quality notebook or planner is always a thoughtful choice, while a set of vibrant highlighters or a desk organizer helps keep their workspace clutter-free. Personalized items, such as a monogrammed tote bag or engraved pen, add a touch of elegance. Consider gifting books aligned with their interests or a subscription to a digital library for endless learning. Eco-friendly accessories, like reusable water bottles or bamboo stationery, are both practical and sustainable, making them ideal for busy, environmentally conscious scholars.
9.3 Gifts for Foodies and Cooking Enthusiasts
Foodies and cooking enthusiasts will love gifts that simplify and enhance their culinary experiences. Multi-functional kitchen gadgets, like a 3-in-1 peeler or spiralizer, are practical and space-saving. Meal prep containers with smart designs ensure organization and freshness. Smart appliances, such as a Wi-Fi-enabled slow cooker or a precision smart thermometer, offer convenience and precision. Subscription services like monthly gourmet boxes or digital recipe platforms also delight. Personalized items, such as engraved cutting boards or monogrammed aprons, add a thoughtful touch. These gifts cater to their passion for cooking while making everyday tasks more efficient and enjoyable.
DIY and Personalized Gifts
DIY craft kits and personalized items offer a thoughtful, creative touch, allowing recipients to enjoy unique, tailored presents that reflect their interests and preferences.
10.1 DIY Craft Kits for Creative Personalization
DIY craft kits are perfect for those who enjoy hands-on creativity, offering a fun way to personalize gifts. From painting sets to embroidery kits, these tools allow for unique, tailored creations. They cater to various interests, making them ideal for crafty individuals. Kits often include materials like beads, fabric, or wood, enabling users to craft items like jewelry, decorations, or personalized accessories. These kits are not only thoughtful gifts but also provide a relaxing, productive activity. They encourage creativity and offer a sense of accomplishment, making them a practical and engaging present for anyone who loves DIY projects.
10.2 Personalized Items for Thoughtful Gifting
Personalized items add a unique touch to gifting, making them extra special and meaningful. A custom notebook with the recipient’s name or initials is both practical and thoughtful. Photo gifts, such as framed memories or personalized calendars, bring joy and nostalgia. Custom jewelry, like engraved necklaces, offers a sentimental value that lasts. These items show effort and care, ensuring the gift stands out. They are perfect for celebrating milestones or everyday gestures, proving that personalization can elevate even the simplest presents into cherished keepsakes.
10.3 Upcycled and Sustainable Gift Ideas
Upcycled and sustainable gifts are both eco-friendly and thoughtful, offering a creative way to reduce waste. Consider gifting items like reusable storage bags, handmade from repurposed fabric, or bamboo utensils for everyday use. Personalized planters made from recycled materials add a touch of greenery to any space. Eco-friendly travel accessories, such as refillable toiletry containers, are practical and align with sustainable living. These gifts not only benefit the environment but also show consideration for the recipient’s values, making them meaningful and impactful choices for any occasion.
Subscription Services as Gifts
Subscription services offer convenience and personalization, providing ongoing value. From monthly boxes tailored to hobbies to digital platforms for streaming and learning, these gifts keep giving all year.
11.1 Monthly Subscription Boxes
Monthly subscription boxes are a thoughtful gift, offering convenience and personalization. They cater to various interests, from gourmet snacks to beauty products, ensuring recipients enjoy new surprises each month. These curated boxes simplify gifting, providing a practical and exciting experience. Whether it’s a book subscription for avid readers or a fitness box for wellness enthusiasts, these services deliver ongoing value. They also eliminate the need for last-minute shopping, making them a hassle-free choice. Subscription boxes are ideal for those who appreciate both practicality and the joy of discovery in their daily routines.
11.2 Digital Subscription Services
Digital subscription services are a modern and practical gift, offering endless convenience. From streaming platforms for entertainment to productivity apps for efficiency, these services simplify daily life. They provide access to a world of content, tools, and resources, making them a thoughtful choice. Whether it’s a music service, a fitness app, or a learning platform, digital subscriptions cater to diverse interests. They also eliminate the need for physical storage, making them ideal for clutter-free living. These services are perfect for those who value ease, accessibility, and the joy of discovering new content regularly.
11.3 Wellness and Self-Care Subscriptions
Wellness and self-care subscriptions are a thoughtful gift, offering convenience and personalization. These services deliver curated products like skincare, teas, or fitness content, promoting relaxation and well-being. They cater to diverse preferences, ensuring recipients find something that resonates with their lifestyle. Many subscriptions provide flexibility, allowing users to pause or customize their plans. These services not only simplify gifting but also encourage mindfulness and self-care routines. By gifting a wellness subscription, you help loved ones prioritize their well-being while enjoying the convenience of regular deliveries tailored to their needs.
Budget-Friendly Gift Options
Discover practical and thoughtful gifts that fit any budget, from affordable tech accessories to Dollar Store finds and homemade treats, ensuring value without compromising on quality or thoughtfulness.
12.1 Affordable Tech Accessories
Affordable tech accessories make great budget-friendly gifts, offering practicality without breaking the bank. Consider phone chargers, portable chargers, or high-quality cables for everyday convenience. Wireless earbuds or affordable headphones are also excellent choices for music lovers. Screen protectors and phone stands are simple yet thoughtful options that enhance device usability. These items are essential for streamlining daily tasks and are appreciated by anyone looking to stay connected and organized. They prove that thoughtful gifting doesn’t have to be expensive, focusing on functionality and simplicity to improve everyday life.
12.2 Dollar Store Finds for Practical Gifting
Dollar store finds are perfect for practical gifting, offering affordable yet useful items that simplify everyday life. From storage bins and kitchen gadgets to cleaning tools, these budget-friendly options are ideal for organization and efficiency. Reusable containers, multi-purpose cleaning wipes, and small organizers are great for decluttering spaces. These gifts are thoughtful, functional, and show you care without breaking the bank. They’re also versatile, suitable for any occasion, making them a go-to choice for quick, practical presents that bring value to daily routines.
12.3 Homemade Treats and Gifts
Homemade treats and gifts are thoughtful, budget-friendly, and deeply personal. Bake cookies, fudge, or granola bars for a delicious, customizable present. DIY crafts like candles, soaps, or knitted items add a personal touch. Photo albums or scrapbooks filled with memories are heartfelt and meaningful. These gifts show effort and care, making them truly special. They’re also eco-friendly and cost-effective, perfect for showing love without overspending. Whether for holidays or everyday occasions, homemade gifts bring joy and warmth, proving that it’s the thought, not the price, that truly matters.