Archive title

Autem vel eum iriure dolor in hendrerit in vulputate velit esse molestie consequat, vel illum dolore eu feugiat nulla facilisis at vero eros et dolore feugait.

Monthly Archive March 31, 2026

mtd yard machine tiller 5hp manual

MTD Yard Machine 5HP Tiller Manual: A Comprehensive Guide

This manual offers detailed instructions for assembly, operation, maintenance, and troubleshooting of your MTD Yard Machine 5HP tiller, ensuring safe and efficient use.

Access archived resources, including models 217-100A, 217-100-300, 390 Series, and 393, for optimal performance and longevity of your equipment.

Welcome to the world of efficient gardening with your MTD Yard Machine 5HP tiller! This robust machine is designed to make soil preparation easier, whether you’re starting a new garden or revitalizing an existing one.

This guide serves as a comprehensive resource, covering everything from initial setup and safe operation to detailed maintenance procedures. Understanding your tiller’s components and following these instructions will maximize its performance and ensure years of reliable service. Remember to always prioritize safety and consult this manual for guidance.

Safety Precautions

Prioritizing safety is paramount when operating your MTD Yard Machine 5HP tiller. Always maintain a firm grip on the handles and be aware of potential bouncing or forward jolts, especially when encountering buried obstacles.

Exercise extreme caution when tilling in hard ground, as the tines can unexpectedly catch and propel the tiller forward. Never operate the tiller without proper footwear and protective eyewear. Thoroughly review all warnings before each use to prevent injuries.

General Safety Rules

Always disconnect the spark plug before making any adjustments or repairs to prevent accidental starting. Keep bystanders, especially children and pets, a safe distance away during operation. Never operate the tiller while under the influence of drugs or alcohol.

Inspect the tiller before each use, ensuring all parts are securely fastened. Wear appropriate safety gear, including sturdy shoes and eye protection. Be mindful of your surroundings and potential hazards.

Specific Tiller Safety Warnings

Exercise extreme caution when tilling near obstacles, as the tines can throw objects forcefully. Be aware the machine may unexpectedly bounce or jump forward if tines strike buried items. Avoid tilling in rocky or heavily rooted soil without first removing obstructions;

Never put hands or feet near rotating tines. Stop the engine completely and wait for all moving parts to cease before clearing debris. Be careful when tilling in hard ground, as tines may catch.

Understanding Your Tiller

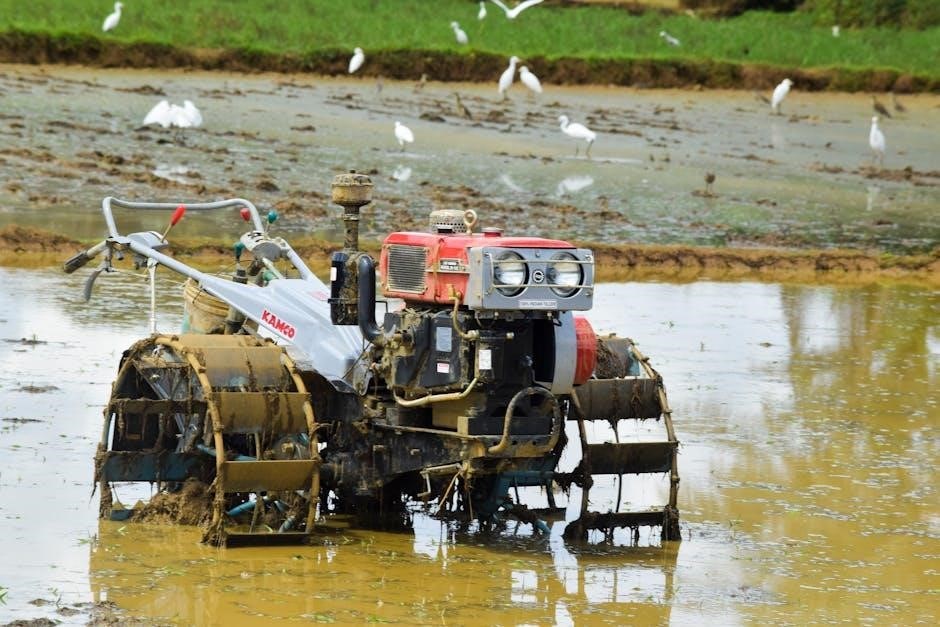
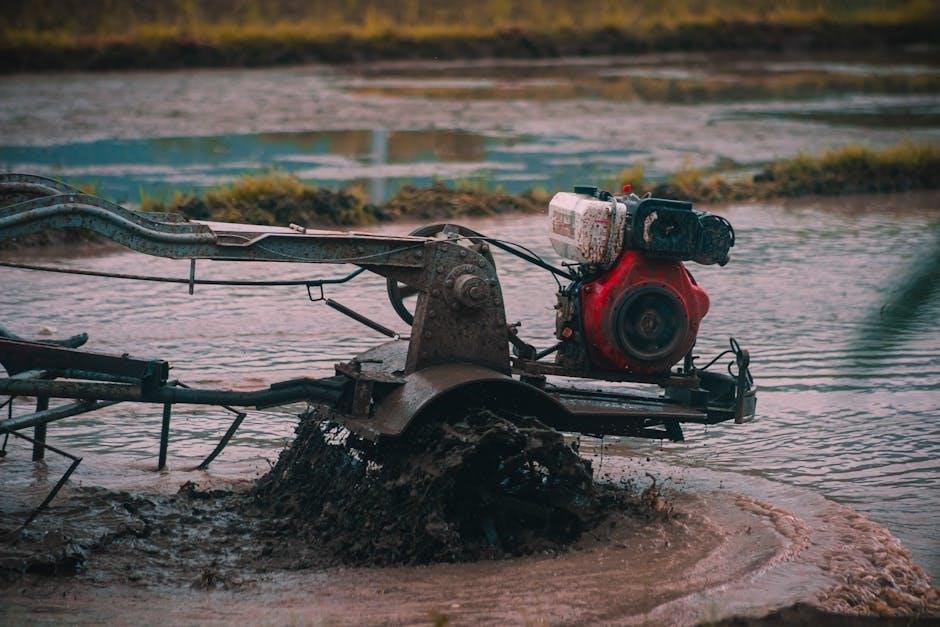
Familiarize yourself with all components before operation. This MTD Yard Machine 5HP tiller features front tines designed for efficient soil preparation. Understanding the function of each part – from the engine to the tilling blades – is crucial for safe and effective use.

Refer to your specific model (217-100A, 217-100-300, 390 Series, or 393) for detailed diagrams and component locations. Proper knowledge ensures optimal performance and extends the tiller’s lifespan.

Key Components and Their Functions

The engine provides power, driving the rotating tines that break up soil. Handles control direction, while the depth stake adjusts tilling depth. The transmission transfers power to the tines, and the shield protects the operator.

Understanding each component’s role is vital for safe operation and maintenance. Regularly inspect tines for wear, ensuring optimal soil preparation. Proper function of all parts guarantees efficient tilling performance.

Model Numbers and Variations (217-100A, 217-100-300, 390 Series, 393)

MTD offers several variations of the 5HP tiller, including models 217-100A and 217-100-300, alongside the 390 Series and 393. While sharing core functionality, slight differences may exist in specific components or features.

Referencing the correct manual for your specific model number is crucial for accurate assembly, maintenance, and troubleshooting. Variations impact parts compatibility, so precise identification is essential for repairs and optimal performance.

Assembly Instructions

Proper assembly is vital for safe and effective operation of your MTD Yard Machine 5HP tiller. Begin with a thorough unboxing and inspection of all components, verifying everything listed in the parts diagram is present.

Carefully attach handles and components following the detailed instructions, ensuring secure connections. Correct tine installation and configuration are also critical for optimal tilling performance. Refer to your model’s specific manual for guidance.

Unboxing and Initial Inspection

Upon receiving your MTD Yard Machine 5HP tiller, carefully unpack all components. Inspect the box for any shipping damage before opening. Once unboxed, cross-reference all parts with the included parts diagram to ensure everything is accounted for.

Check for any visible defects or missing pieces. Document any discrepancies immediately and contact MTD customer service. A thorough initial inspection prevents issues during assembly and operation, guaranteeing a smooth start.

Attaching Handles and Components

Begin by securely attaching the handles to the tiller’s main frame, utilizing the provided bolts and washers. Ensure proper alignment for comfortable operation. Next, connect any additional components, like the rear wheel kit (if included), following the parts diagram closely.

Tighten all fasteners firmly, but avoid over-tightening. Double-check all connections before proceeding, guaranteeing stability and preventing potential hazards during tilling. A well-assembled tiller is crucial for safe and efficient use.

Tine Installation and Configuration

Proper tine installation is vital for effective soil cultivation. Ensure the tines are securely fastened to the tiller rotor, using the correct bolts and retaining clips. Verify that all tines are aligned and rotate freely before operation.

Configure the tines based on your soil type and tilling needs. Adjusting the tine angle can impact tilling depth and aggressiveness. Regularly inspect tines for wear and damage, replacing them as needed to maintain optimal performance.

Starting the Tiller

Before starting, confirm the fuel and oil levels meet the manufacturer’s specifications. Use fresh gasoline and the recommended oil type for optimal engine performance. Engage the tiller brake to prevent accidental movement during startup;

For a cold engine, utilize the priming bulb and set the choke. For a warm engine, minimal or no choke is required. Follow the recoil starter procedure, pulling firmly and smoothly until the engine ignites.

Fuel and Oil Requirements

The MTD Yard Machine 5HP tiller requires unleaded gasoline with a minimum octane rating of 87. Always check the operator’s manual for specific fuel capacity details. For lubrication, utilize a high-quality SAE 30 weight oil, particularly for warmer temperatures.

Ensure proper oil levels before each use, referencing the dipstick for accurate measurement. Avoid overfilling, as this can cause engine damage. Regularly inspect and replace the oil according to the maintenance schedule.

Priming and Choke Procedures

Before starting a cold engine, press the primer bulb several times until fuel is visible. This action introduces fuel into the carburetor. Next, position the choke lever to the ‘CHOKE’ setting, restricting airflow for a richer fuel mixture.

For a warm start, the choke may not be necessary. If needed, apply only a brief choke before attempting to start. Gradually return the choke to the ‘RUN’ position as the engine warms up, ensuring smooth operation.

Starting Procedures (Warm & Cold Engine)

For a cold start, ensure the choke is engaged and the throttle is set to the starting position. Firmly grasp the starter grip and pull the cord with a smooth, controlled motion. Repeat as needed, allowing the cord to retract fully.

When restarting a warm engine, the choke may not be required. Pull the starter cord directly, without priming, and be prepared for a quicker start. Avoid excessive pulling to prevent damage.

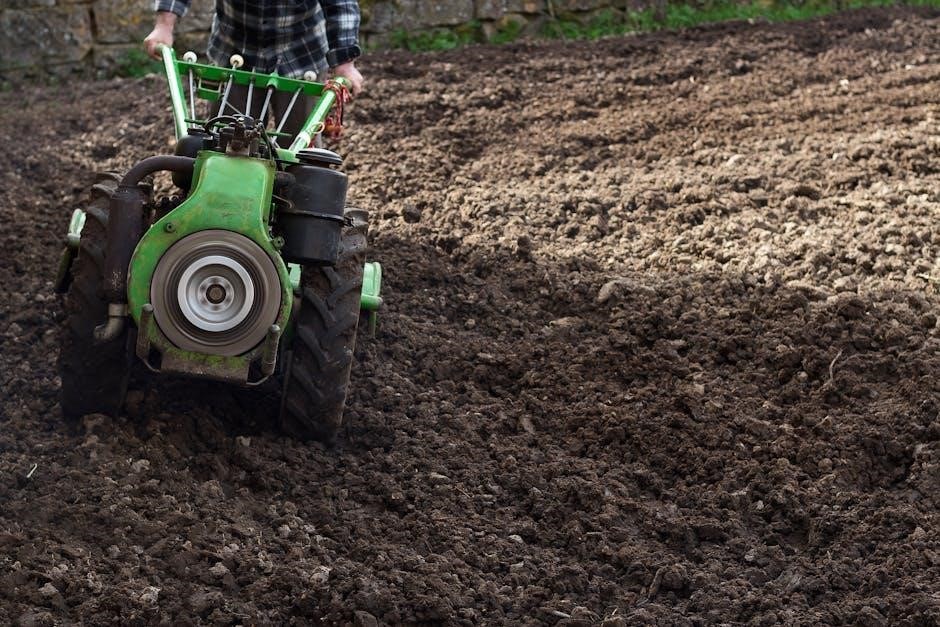
Operating Instructions

Begin tilling in a lower gear, gradually increasing speed as you gain experience. Maintain a firm grip on the handles, anticipating potential bounces or forward jolts, especially in hard ground. Adjust the tilling depth to suit your soil type and needs.

Navigate obstacles carefully, lifting the tiller slightly when encountering rocks or roots. Be mindful of the tines catching, which can propel the machine forward unexpectedly.

Proper Tilling Techniques

Start with a slow, steady pace, allowing the tiller to self-propel. Overlap each pass slightly to ensure thorough soil cultivation. Maintain a consistent depth, avoiding excessive force that could cause bouncing or stalling.

Be prepared for the tiller to react to varying soil conditions; a firm grip is essential. When encountering resistance, reduce speed and allow the tines to work through the obstruction gradually.

Adjusting Tilling Depth

The tilling depth is controlled by the adjustable skid shoes located beneath the tiller. Lowering the shoes increases depth, while raising them decreases it. Begin with a shallow depth for the first pass, especially in unworked ground.

Gradually increase the depth with subsequent passes until the desired level of cultivation is achieved. Monitor the engine load; excessive depth can strain the engine and cause stalling.

Navigating Obstacles and Hard Ground

When encountering rocks or roots, reduce forward speed and allow the tiller to work through them gradually. Avoid forcing the machine, as this can damage the tines or engine. Be prepared for the tiller to bounce or jump forward.

In hard ground, reduce the tilling depth and make multiple passes. The tines may catch, propelling the tiller forward – maintain a firm grip on the handles for control.

Maintenance and Care

Regular inspection is crucial for optimal performance. Check oil levels before each use and change the oil according to the manual’s schedule. Inspect tines for wear and sharpen them as needed to maintain effective soil penetration.

Consistent maintenance extends the life of your MTD tiller. Address any issues promptly, referring to the troubleshooting section for guidance. Proper care ensures reliable operation season after season.

Regular Inspection Checklist

Before each use, verify oil and fuel levels are correct. Inspect all bolts and fasteners, tightening as necessary, to prevent loosening during operation. Examine the tines for damage or excessive wear, and check the drive chain for proper tension and lubrication.

Also, confirm safety shields are securely in place and functioning correctly. A quick visual inspection before each tilling session ensures safe and efficient operation of your MTD Yard Machine.

Oil Change Procedures

Warm the engine briefly before draining the old oil for easier flow. Locate the drain plug and position a suitable container underneath. Remove the plug and allow the oil to drain completely, then reinstall the plug securely.

Refill with the recommended oil type and quantity, checking the dipstick to ensure proper level. Regularly changing the oil maintains optimal engine performance and extends the life of your MTD tiller.

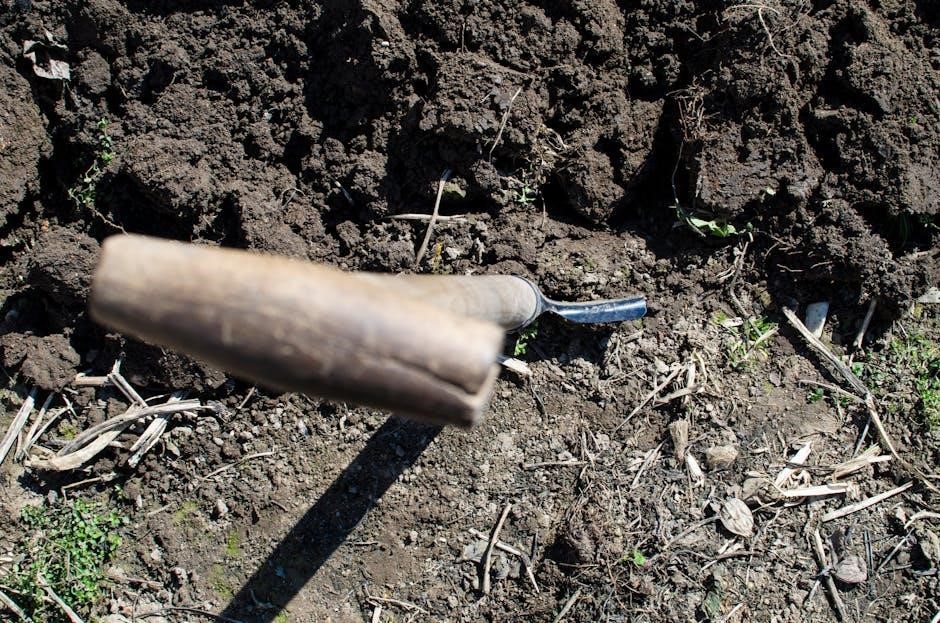
Tine Maintenance and Sharpening

Regularly inspect the tines for wear, damage, or bending. Replace any damaged tines immediately to maintain efficient tilling. Sharpening dull tines restores their cutting ability, improving performance in hard or compacted soil.

Use a metal file or grinder to carefully sharpen the tines, maintaining the original angle. Proper tine maintenance ensures optimal soil preparation and reduces strain on the tiller’s engine.

Troubleshooting Common Issues

If the engine fails to start, check the fuel level, spark plug, and air filter. Excessive vibration often indicates loose bolts or damaged tines – inspect and tighten accordingly. Difficulty moving the tiller can stem from clogged tines or overly compacted soil.

Be cautious of the tiller bouncing or jumping forward when tines strike buried objects; reduce speed and proceed carefully. Refer to the manual for detailed diagnostic steps and safety precautions.

Engine Won’t Start

If your 5HP engine refuses to start, first verify sufficient fuel and clean, fresh gasoline. Inspect the spark plug for fouling or damage, replacing if necessary. Ensure the air filter is clean to allow proper airflow. Confirm the choke is engaged correctly for cold starts, and disengaged for warm restarts.

Check the ignition switch and wiring connections. A flooded engine may require repeated pull-starts with the choke off.

Tiller Vibrates Excessively

Excessive vibration often indicates an imbalance in the tines. Inspect each tine for damage, bending, or missing components. Ensure all tines are securely fastened and tightened to the correct torque specifications. A loose or damaged tine can cause significant vibration.

Check for debris lodged between the tines or around the rotor. Worn engine mounts or bearings can also contribute to vibration; inspect these components carefully.

Difficulty Moving the Tiller

Struggling to move the tiller often stems from tines catching in the ground, especially in hard or rocky soil. Adjust the tilling depth to a shallower setting to reduce resistance. Ensure the drive belt is properly tensioned and not slipping.

Inspect the wheels for proper inflation and free rotation. Obstructions like rocks or roots can also hinder movement; clear these before resuming operation.

Parts Diagram and Replacement

Locating parts diagrams is crucial for identifying components needing replacement. MTD provides comprehensive diagrams, often accessible online or through customer service. Utilize the model number (217-100A, 217-100-300, 390 Series, 393) when searching for accurate schematics.

Replacement parts can be ordered directly from MTD or authorized dealers. Ensure compatibility by referencing the parts list and model number before purchasing. eBay also offers operator manuals and parts.

Locating Parts Diagrams

Finding the correct parts diagram begins with your tiller’s specific model number – 217-100A, 217-100-300, 390 Series, or 393. MTD’s official website is a primary resource, offering downloadable diagrams. Alternatively, the Internet Archive may host older manuals with diagrams.

Searching online using keywords like “MTD tiller parts diagram” plus your model number will yield results. Remember that accurate identification is key to ordering the correct replacement parts.

Ordering Replacement Parts

Once you’ve identified the needed part using the diagrams, several avenues exist for ordering. MTD’s website offers direct purchase, ensuring genuine parts. Retailers like eBay list operator manuals and parts, including those for the Mark Master 5HP tiller.

Local hardware stores and small engine repair shops can also source parts. Always verify compatibility with your specific model number before finalizing any purchase to avoid issues.

Understanding the Operator’s Manual

Your MTD Yard Machine tiller’s manual is a crucial resource. It’s divided into sections covering assembly, safety, operation, and maintenance. Pay close attention to safety symbols – they highlight potential hazards.

Decoding these symbols ensures safe operation. The manual details proper tilling techniques and troubleshooting steps. Refer to it for model-specific information and always keep it accessible for future reference.

Decoding Manual Sections

The operator’s manual is logically structured, beginning with safety precautions and progressing to assembly, operation, and maintenance. Each section contains detailed instructions and diagrams for clarity. Familiarize yourself with the table of contents to quickly locate specific information.

Pay attention to numbered steps and illustrations. Understanding the manual’s organization will streamline maintenance and troubleshooting, maximizing your tiller’s lifespan and performance.

Safety Symbols and Their Meanings

The manual utilizes standardized safety symbols to alert operators to potential hazards. A “Caution” symbol indicates conditions that could result in equipment damage, while a “Warning” signifies possible injury. Always heed these warnings and follow recommended safety procedures.

Be aware of symbols related to rotating parts, thrown objects, and fuel handling. Understanding these symbols is crucial for preventing accidents and ensuring safe operation of your MTD Yard Machine 5HP tiller.

Tilling Best Practices

Effective tilling requires proper soil preparation; remove large rocks and debris beforehand. Adjust the tilling depth to suit your needs, starting shallow for initial passes. Tilling in different soil types demands varied approaches – sandy soils require less depth than clay-rich ones.

Be cautious when tilling hard ground, as tines may catch and propel the tiller forward unexpectedly. Always maintain a firm grip and be prepared for potential bouncing or jumping.

Preparing the Soil for Tilling

Prior to tilling, thoroughly clear the area of all rocks, roots, and large clumps of debris. This prevents damage to the tiller tines and ensures smoother operation. Mark underground utilities to avoid accidental damage during tilling. Remove surface obstacles like branches and trash.

Loosen compacted soil with a garden fork before the first pass, especially in hard-packed areas, to ease the tiller’s workload.

Tilling in Different Soil Types

Sandy soils require less effort, allowing for faster tilling speeds and shallower depths. Clay soils are more challenging, demanding slower speeds and multiple passes to break up compaction. Loamy soils, a balanced mix, till easily with moderate speed and depth settings.

Be cautious in hard ground; the tines may catch and propel the tiller forward unexpectedly, requiring firm grip control.

Dealing with Unexpected Issues

If the tiller bounces or jumps forward, immediately disengage the drive and check for buried obstacles like rocks or roots. Reduce tilling depth and proceed slowly. When tines catch, stop the engine, disengage the drive, and carefully rock the tiller back and forth to free them.

Maintain a firm grip on the handles to control the machine and prevent unexpected movements during operation.

Tiller Bouncing or Jumping Forward

Unexpected bouncing or forward jolts often occur when the tiller’s tines encounter hidden obstructions beneath the soil’s surface, such as rocks or substantial roots. Immediately disengage the drive to regain control and prevent injury. Reduce the tilling depth to minimize the impact of future obstructions.

Always maintain a secure grip on the tiller handles, anticipating potential upward or forward movements, and proceed cautiously.

Tines Catching in the Ground

If the tines become lodged, immediately disengage the drive and shut off the engine to prevent further strain or potential damage. Hard, compacted soil or large root systems are common causes of this issue. Reduce the tilling speed and depth to alleviate the strain on the tines.

Carefully rock the tiller back and forth to free the tines, avoiding forceful jerking motions that could cause injury or damage.

Winter Storage

Proper winterization is crucial for preserving your MTD Yard Machine 5HP tiller. Before long-term storage, thoroughly clean the unit, removing all soil and debris. Drain the fuel tank completely or add a fuel stabilizer to prevent gumming and corrosion within the fuel system.

Change the engine oil and inspect all components for wear. Store the tiller in a dry, covered area to protect it from the elements and ensure easy spring startup.

Preparing the Tiller for Long-Term Storage

Thorough preparation is key for successful long-term storage of your MTD Yard Machine 5HP tiller. Begin by cleaning all accumulated dirt and debris from the machine’s exterior. Inspect belts and tines for damage, addressing any issues before storage. Ensure the fuel tank is either completely drained or treated with a fuel stabilizer.

Apply a light coat of oil to metal surfaces to prevent rust, and store the tiller in a dry, sheltered location.

Fuel Stabilization and Drain Procedures

Proper fuel management is crucial for preventing carburetor issues during storage. If not draining the fuel tank completely, add a fuel stabilizer according to the manufacturer’s instructions; This prevents fuel degradation and varnish buildup. To drain, use a siphon pump or carefully tilt the tiller, collecting fuel into an approved container.

Dispose of fuel responsibly and run the engine briefly after draining to clear remaining fuel lines.

MTD Support and Resources

For assistance with your MTD Yard Machine 5HP tiller, numerous resources are available. Contact MTD Customer Service directly for specific inquiries or troubleshooting. Explore online resources, including frequently asked questions (FAQs) and support documentation, on the official MTD website.

The Internet Archive hosts user manuals for various models, like the 390 Series and 393, offering valuable historical information and potential solutions.

Contacting MTD Customer Service

To reach MTD Customer Service for support regarding your Yard Machine 5HP tiller, visit the official MTD website. Locate the “Contact Us” section to find phone numbers, email addresses, and online chat options. Be prepared to provide your tiller’s model number (217-100A, 217-100-300, 390 Series, or 393) and a detailed description of your issue.

Prompt and efficient assistance is available to resolve any concerns you may have.

Online Resources and FAQs

MTD provides extensive online resources to assist with your Yard Machine 5HP tiller. Explore the MTD website for downloadable manuals, parts diagrams, and troubleshooting guides for models 217-100A, 217-100-300, 390 Series, and 393. Frequently Asked Questions (FAQs) address common issues, offering quick solutions.

The Internet Archive also hosts user manuals, providing historical access to information.

Additional Tips for Efficient Tilling

Optimize your tilling pattern by making multiple passes, gradually increasing the tilling depth with each pass. Be cautious of obstacles; the tiller may unexpectedly bounce or jump forward if tines strike buried objects. Reduce bouncing by adjusting speed and depth.

Always be aware when tilling in hard ground, as tines can catch and propel the tiller forward.

Optimizing Tilling Speed and Pattern

Begin with a slower pace to assess soil conditions and adjust tilling depth accordingly. Employ overlapping passes, ensuring complete soil coverage and minimizing untouched areas. Monitor for bouncing; reduce speed if the tiller jumps or vibrates excessively.

Consistent forward motion is key, but be prepared to adjust for obstacles and varying soil resistance, maintaining control at all times.

Using Attachments (if applicable)

Confirm attachment compatibility with your specific MTD Yard Machine 5HP tiller model before use. Carefully follow installation instructions, ensuring secure attachment to prevent accidents or damage. Adjust tilling depth as needed when using attachments, considering their specific functions.

Reduce speed and maintain control, as attachments can alter the tiller’s handling characteristics. Regularly inspect attachments for wear and tear, replacing damaged parts promptly.

lenze i550 protec manual

The Lenze i550 Protec represents a robust drive solution; however‚ current website limitations prevent full access to detailed manual information presently.

Overview of the i550 Protec Drive System

The Lenze i550 Protec drive system is a decentralized frequency inverter designed for a wide range of applications‚ offering flexibility and scalability. It integrates seamlessly into various automation environments‚ providing precise motor control and advanced diagnostic capabilities. Currently‚ accessing comprehensive details via the official documentation is hampered by temporary website resource limitations‚ impacting immediate manual availability.

This system excels in applications demanding high performance and reliability‚ such as material handling‚ packaging‚ and general motion control. The i550 Protec’s modular design allows for easy customization and expansion‚ adapting to evolving project needs. Despite the current access issues‚ the system’s core functionality remains consistent with Lenze’s commitment to quality and innovation.

Hardware Components

Due to ongoing website constraints‚ a complete hardware component list from the i550 Protec manual is temporarily unavailable for detailed specification.

Power Supply Module

The i550 Protec’s power supply module is a critical component‚ responsible for converting incoming AC voltage to the DC voltage required by the drive system. Currently‚ detailed specifications regarding input voltage ranges‚ permissible fluctuations‚ and inrush current limitations are inaccessible due to website resource limitations.

However‚ generally‚ these modules feature robust protection against overvoltage‚ undervoltage‚ and short circuits. They often include diagnostic LEDs to indicate power status and potential faults. Further information concerning specific model variations and their respective power ratings‚ as detailed in the official manual‚ remains unavailable at this time. Please check back later for a comprehensive overview.

Control Module

The i550 Protec’s control module serves as the ‘brain’ of the drive system‚ processing commands and regulating motor operation. Unfortunately‚ due to current website constraints‚ accessing detailed information regarding its processor type‚ memory capacity‚ and supported control modes is restricted.

Typically‚ these modules support various control methods‚ including scalar control‚ vector control‚ and servo control. They also handle communication with external devices via fieldbus interfaces. Diagnostic features and parameterization options are central to its functionality‚ but specifics are currently unavailable. Refer to the official Lenze documentation when it becomes accessible for a complete understanding.

Motor Output Stage

The motor output stage of the Lenze i550 Protec is responsible for delivering the controlled power to the connected motor. Regrettably‚ the current website limitations hinder access to precise details concerning its switching technology – typically IGBTs – and current/voltage ratings.

This stage incorporates protective elements like short-circuit protection and overload prevention. It’s designed to efficiently manage the power flow‚ ensuring optimal motor performance. Specific information regarding supported motor types (induction‚ synchronous) and output frequency ranges are presently inaccessible. Consult the official Lenze documentation for comprehensive specifications when available.

Communication Interfaces

The Lenze i550 Protec offers various communication interfaces for integration into automation systems‚ but detailed specifics are currently limited due to website constraints. Standard options typically include Ethernet/IP‚ PROFINET‚ and PROFIBUS‚ enabling seamless data exchange and control.

These interfaces facilitate parameterization‚ monitoring‚ and diagnostics. The availability of specific protocols may vary depending on the chosen control module. Further details regarding supported communication speeds‚ addressing schemes‚ and diagnostic data formats are presently unavailable. Refer to the official Lenze documentation for a complete overview when access is restored.

Installation and Commissioning

Due to current resource limitations‚ comprehensive installation and commissioning guidance for the Lenze i550 Protec is temporarily unavailable online.

Mechanical Installation

Currently‚ detailed mechanical installation procedures for the Lenze i550 Protec are restricted due to ongoing website resource constraints. However‚ general best practices dictate ensuring a stable‚ vibration-dampened mounting surface capable of supporting the drive’s weight and anticipated operational loads.

Proper alignment with the driven machine is crucial to prevent premature bearing wear and maintain optimal performance. Adhere strictly to specified mounting orientations and clearances to facilitate adequate cooling and prevent overheating.

Given the limited access to the manual‚ prioritize consulting Lenze’s application engineering team for specific mounting recommendations tailored to your application. Careful consideration of environmental factors‚ such as ambient temperature and humidity‚ is also essential during installation.

Electrical Connections

Due to current website limitations‚ comprehensive electrical connection details for the Lenze i550 Protec are temporarily unavailable. However‚ standard industrial practice mandates strict adherence to local and national electrical codes during all wiring procedures.

Ensure the main power supply is disconnected and properly locked out/tagged out before commencing any electrical work. Verify correct voltage and phase sequence compatibility before connecting the drive.

Considering the restricted manual access‚ it’s vital to consult a qualified electrician and Lenze’s support resources for detailed wiring diagrams and grounding instructions. Proper shielding and cable routing are essential to minimize electromagnetic interference and ensure reliable operation.

Parameterization Basics

Currently‚ detailed parameterization guidance for the Lenze i550 Protec is limited due to website resource constraints. However‚ initial setup typically involves configuring motor nominal data – voltage‚ current‚ speed‚ and frequency.

Accessing parameters usually requires a Lenze engineering tool or the local control panel. Understanding parameter groups – motor‚ application‚ and protection – is crucial for proper drive operation.

Given the restricted manual access‚ it’s highly recommended to utilize Lenze’s application support and online resources for specific parameter settings. Incorrect parameterization can lead to suboptimal performance or drive damage; proceed with caution and expert guidance.

Parameter Groups & Settings

Due to ongoing website issues‚ comprehensive details regarding i550 Protec parameter groups remain inaccessible at this time; consult Lenze support.

Motor Parameters

Currently‚ accessing specific motor parameter details within the Lenze i550 Protec manual online is hampered by resource limitations on the website. However‚ these parameters are crucial for optimal drive performance and protection. They encompass fundamental motor data like rated voltage‚ current‚ frequency‚ speed‚ and power.

Essential settings include motor nominal current‚ rated speed‚ pole pairs‚ and winding resistance. Accurate input of these values ensures correct motor modeling within the drive controller‚ enabling precise speed and torque control. Incorrect parameters can lead to instability‚ reduced performance‚ or even motor damage; Refer to the motor nameplate and‚ when available‚ detailed motor documentation for precise values. Lenze support can also assist in determining appropriate settings when online resources are unavailable.

Application Parameters

Due to ongoing website resource constraints‚ comprehensive access to the Lenze i550 Protec manual’s application parameters is temporarily restricted. These parameters define how the drive behaves within a specific application‚ tailoring its performance to the task at hand. Key settings include acceleration and deceleration times‚ speed control mode (e.g.‚ V/f‚ vector control)‚ and jerk limits.

Application-specific functions‚ like positioning profiles or S-ramp control‚ are also configured here. Proper adjustment of these parameters optimizes dynamic response‚ minimizes mechanical stress‚ and ensures smooth operation. Consider the load characteristics and process requirements when configuring these settings. Lenze provides application examples and guidelines to assist in parameter selection‚ despite current online access limitations.

Protection Parameters

Present website limitations hinder complete access to the Lenze i550 Protec manual’s protection parameter details. These crucial settings safeguard the drive and connected machinery from damage. Key parameters include overcurrent‚ overvoltage‚ undervoltage‚ and overload protection thresholds. Stall prevention and short-circuit protection are also configurable.

Adjusting these parameters appropriately balances protection sensitivity with acceptable operating conditions. Incorrect settings can lead to nuisance trips or insufficient protection. Refer to the full manual (when accessible) for detailed guidance on setting these parameters based on motor and application characteristics. Prioritize safety and consult qualified personnel for optimal protection configuration‚ given current access restrictions.

Operation and Control

Due to ongoing website issues‚ comprehensive operational control details from the Lenze i550 Protec manual are temporarily unavailable for immediate access.

Local Control Panel Operation

Navigating the i550 Protec’s local control panel allows for direct interaction with the drive system‚ offering essential monitoring and control capabilities. However‚ accessing detailed instructions via the official Lenze documentation is currently hindered by website resource limitations.

Typically‚ the panel provides a user interface for starting‚ stopping‚ and adjusting speed references. Key parameters and fault indications are displayed‚ enabling quick diagnostics. Parameter adjustments‚ though possible‚ require appropriate authorization levels.

Given the current website constraints‚ specific button functions and menu structures are unavailable. Referencing a fully accessible manual is crucial for safe and effective operation.

Remote Control via Fieldbus

The Lenze i550 Protec supports remote control and monitoring through various fieldbus interfaces‚ enhancing integration into automated systems. Unfortunately‚ detailed configuration specifics are presently inaccessible due to ongoing website resource limitations impacting manual availability;

Commonly supported protocols include Ethernet/IP‚ PROFINET‚ and PROFIBUS‚ enabling seamless communication with PLCs and other control devices. Remote operation allows for centralized supervision‚ parameter adjustments‚ and fault diagnostics.

Due to the current website issues‚ precise register maps and communication settings cannot be provided. Consulting a complete‚ downloadable manual is essential for successful fieldbus integration.

Diagnostics and Troubleshooting

Currently‚ accessing comprehensive diagnostic and troubleshooting information for the Lenze i550 Protec is restricted due to website resource limitations.

Fault Codes and Error Messages

Decoding fault codes within the Lenze i550 Protec system is crucial for efficient troubleshooting‚ yet current online access is hampered by resource constraints. The manual‚ when fully accessible‚ details a comprehensive list of error messages‚ categorized by severity and potential causes. These codes provide vital clues regarding issues within the power supply‚ control module‚ motor output stage‚ or communication interfaces.

Understanding these messages allows technicians to pinpoint the source of the problem quickly‚ minimizing downtime. The documentation typically includes suggested corrective actions for each fault code‚ ranging from simple parameter adjustments to component replacement. However‚ due to the present website limitations‚ detailed code explanations and resolution steps are temporarily unavailable‚ impacting immediate diagnostic capabilities.

Common Troubleshooting Steps

Initial troubleshooting of the Lenze i550 Protec‚ unfortunately‚ faces hurdles due to current website resource limitations hindering full manual access. Generally‚ begin by verifying power supply connections and voltage levels. Inspect all wiring for looseness or damage‚ and confirm proper grounding. Check the status of communication interfaces‚ ensuring correct cable connections and baud rate settings.

Review recent parameter changes‚ as incorrect settings can trigger faults. Utilize the local control panel for basic diagnostics‚ observing any displayed error messages. However‚ comprehensive troubleshooting guidance‚ including detailed step-by-step procedures and diagnostic charts‚ remains temporarily unavailable due to the ongoing website issues‚ impacting effective problem resolution.

Safety Considerations

Due to website limitations‚ complete safety guidance is unavailable; however‚ always prioritize disconnecting power before maintenance and heed all local regulations.

Emergency Stop Functionality

The Lenze i550 Protec incorporates a critical emergency stop (E-Stop) function‚ designed for immediate machine shutdown in hazardous situations. This functionality‚ vital for operator and equipment safety‚ requires careful implementation and testing. The E-Stop circuit must be wired as a safety-related circuit‚ adhering to relevant safety standards like ISO 13849-1.

Activation of the E-Stop initiates a controlled shutdown‚ removing power to the motor output stage via Safe Torque Off (STO). Regular testing of the E-Stop functionality is paramount‚ verifying its responsiveness and proper operation. Due to current website resource limitations‚ detailed wiring diagrams and configuration specifics are temporarily unavailable; consult official Lenze documentation when accessible for comprehensive guidance. Proper E-Stop integration is crucial for a safe operating environment.

Safe Torque Off (STO)

Safe Torque Off (STO) is a safety function integral to the Lenze i550 Protec‚ ensuring immediate deactivation of the motor’s torque. This is achieved by disabling the power stage‚ effectively removing power from the motor windings while maintaining control system power. STO is crucial for applications requiring rapid and reliable shutdown during emergencies or maintenance.

Implementation necessitates adherence to safety standards (e.g.‚ IEC 61800-5-2) and proper wiring of the safety circuit. Currently‚ due to website resource constraints‚ detailed STO configuration parameters and wiring schematics are limited. Refer to the official Lenze documentation for precise instructions. Correct STO implementation guarantees a safe and controlled machine state‚ preventing unintended movement and enhancing operational safety.

Maintenance

Due to current website limitations‚ comprehensive maintenance schedules for the Lenze i550 Protec are unavailable; consult official Lenze documentation for details.

Regular Inspection Procedures

Given the present website resource limitations‚ detailed inspection procedures for the Lenze i550 Protec are restricted. However‚ routine visual checks are crucial.

Inspect all cabling for signs of wear‚ damage‚ or loose connections‚ ensuring secure terminations. Verify the cleanliness of the drive’s heatsink and fan‚ removing any accumulated dust or debris to maintain optimal cooling performance.

Check for unusual noises emanating from the drive or motor‚ which could indicate bearing issues or mechanical faults. Regularly monitor operating temperatures using available diagnostic tools‚ comparing readings to specified limits.

Always refer to the official Lenze i550 Protec documentation for a complete and accurate inspection checklist and schedule.

Cooling System Maintenance

Due to current website access restrictions‚ comprehensive cooling system maintenance details for the Lenze i550 Protec are limited. However‚ maintaining adequate cooling is paramount for reliable operation.

Regularly inspect the cooling fan for proper function‚ ensuring it spins freely and without obstruction. Clean the heatsink fins with compressed air to remove dust and debris‚ maximizing heat dissipation.

Verify that airflow is not restricted by surrounding components or enclosures. Monitor drive temperature through diagnostic tools‚ noting any unusual increases.

Consult the official Lenze i550 Protec documentation for specific cooling system maintenance schedules and recommended procedures.

Technical Specifications

Access to the Lenze i550 Protec’s detailed technical specifications‚ including performance data and environmental conditions‚ is currently unavailable due to website issues.

Performance Data

Currently‚ obtaining precise performance data for the Lenze i550 Protec drive system is hampered by temporary website limitations. The intended comprehensive documentation‚ detailing output power ranges‚ current capacities‚ and efficiency ratings across various operating conditions‚ remains inaccessible.

Users seeking specific performance metrics – such as maximum torque‚ speed ranges‚ and overload capabilities – will unfortunately encounter restricted access at this time. The manual typically provides detailed charts and graphs illustrating performance curves‚ but these are presently unavailable.

We anticipate restoring full access to this critical information shortly‚ enabling users to accurately assess the i550 Protec’s suitability for their applications. Please check back later for updates.

Environmental Conditions

Access to detailed environmental condition specifications for the Lenze i550 Protec is currently restricted due to ongoing website resource limitations. The complete manual typically outlines permissible operating temperature ranges‚ humidity levels‚ and altitude restrictions for optimal performance and longevity.

Information regarding vibration and shock resistance‚ as well as ingress protection (IP) ratings‚ is temporarily unavailable. Users requiring data on suitability for harsh environments – including exposure to dust‚ water‚ or corrosive substances – will find access limited at this time.

We are working to resolve these issues and restore full documentation access promptly.

Firmware Updates

Currently‚ accessing specific firmware update procedures and release notes for the Lenze i550 Protec is hampered by website resource constraints.

Update Procedures

Due to present website limitations‚ detailed‚ step-by-step firmware update procedures for the Lenze i550 Protec are temporarily unavailable. Generally‚ updates involve accessing the drive controller via a compatible communication interface‚ such as Ethernet or USB.

The process typically requires downloading the correct firmware file from the Lenze website (when accessible) and utilizing Lenze’s configuration software to initiate the upload. It’s crucial to ensure a stable power supply during the entire update process to prevent data corruption.

Always consult the official Lenze documentation – when available – for specific instructions and safety precautions related to your particular i550 Protec model and firmware version.

Release Notes

Currently‚ accessing comprehensive release notes for the Lenze i550 Protec firmware is hindered by ongoing website resource limitations. Typically‚ release notes detail the improvements‚ bug fixes‚ and new features included in each firmware version.

They also outline any known issues or compatibility concerns. Lenze generally provides these notes as a separate document accompanying the firmware download.

Reviewing the release notes before updating is vital to understand the potential impact on your application and to ensure a smooth transition. When the website is fully functional‚ these notes will be readily available for download.

i will teach you to be rich filetype:pdf

I Will Teach You to Be Rich: A Comprehensive Guide

Ramit Sethi’s acclaimed guide, available in formats like EPUB, PDF, MOBI, and as an audiobook, empowers readers to master their finances. This 82-109 page resource focuses on conscious spending and redirecting funds towards desired goals.

Understanding the Core Philosophy

Ramit Sethi’s core philosophy, detailed within the PDF version of “I Will Teach You to Be Rich,” moves beyond traditional budgeting. It advocates for a Conscious Spending Plan – a system prioritizing spending on things you love while ruthlessly cutting back on everything else.

The book challenges the notion of deprivation, instead promoting intentionality with your money. It’s about automating your finances to ensure saving and investing happen before you have a chance to spend. This isn’t about restriction; it’s about designing a life where you can afford what truly matters.

Sethi emphasizes understanding your personal values and aligning your spending with them. The program, outlined in the book and supported by online resources, aims to break down complex financial concepts into actionable steps, ultimately leading to long-term wealth building and financial freedom. It’s a holistic approach, encompassing everything from bank account setup to investment strategies.

The Six-Week Program Overview

“I Will Teach You to Be Rich,” available as a PDF and in other formats, presents a structured, six-week program designed for adults aged 20-35. This isn’t a passive read; it’s an active plan requiring consistent effort. The program, as detailed in the book, begins with assessing your current financial situation and defining clear, actionable goals.

Weeks are dedicated to automating finances – setting up bank accounts and optimizing credit card usage for rewards. Subsequent weeks delve into investment accounts, covering brokerage and retirement options, with a strong emphasis on low-cost index funds.

The program doesn’t shy away from debt management, offering strategies for prioritization and negotiation. Interactive charts, accessible through Sethi’s website, complement the PDF content, providing personalized insights and tracking tools. It’s a comprehensive system built to transform financial habits.

Defining Your Financial Goals

The core of “I Will Teach You to Be Rich,” accessible in PDF format and other versions, emphasizes the importance of intentionality. Before diving into budgets or investments, the book stresses defining what you’re saving for. Vague aspirations like “retirement” are insufficient; instead, envision specific, motivating goals.

Are you saving for a dream vacation – perhaps to China, as the book suggests? A down payment on a house? Early retirement? The PDF guide encourages readers to quantify these goals, assigning concrete dollar amounts and timelines. This clarity transforms saving from a chore into a purposeful pursuit.

Sethi advocates for prioritizing goals based on personal values. This isn’t about deprivation; it’s about consciously allocating resources to the things that genuinely matter, ensuring your money reflects your priorities; The book provides frameworks for identifying and articulating these values.

Automating Your Finances: The Foundation

“I Will Teach You to Be Rich,” readily available as a PDF download, positions automation as the cornerstone of financial success. The book argues that relying on willpower alone is unsustainable; instead, establish systems that handle your money automatically, minimizing the need for constant, conscious effort.

This involves setting up automatic transfers from your checking account to savings and investment accounts. The PDF guide details how to schedule these transfers, ensuring consistent progress towards your financial goals. It’s about “paying yourself first” – prioritizing savings before discretionary spending.

Automation extends to bill payments, preventing late fees and maintaining a good credit score. The book advocates for leveraging technology to streamline these processes. By removing the manual aspects of personal finance, you free up time and mental energy, fostering long-term financial discipline.

Setting Up Bank Accounts

According to the PDF version of “I Will Teach You to Be Rich,” strategically selecting bank accounts is crucial. The book doesn’t advocate for simply opening any account; it emphasizes finding institutions that align with your financial goals and minimize fees. A key recommendation is separating spending money from savings.

This often involves utilizing multiple accounts: a checking account for daily expenses, a high-yield savings account for short-term goals (like a vacation), and investment accounts for long-term wealth building. The PDF guide stresses the importance of researching account fees, interest rates, and accessibility.

Furthermore, the book suggests considering online banks, which often offer better rates and lower fees compared to traditional brick-and-mortar institutions. The goal is to create a system where your money is working for you, not being eroded by unnecessary charges. This foundational step sets the stage for effective financial management.

Credit Card Strategy: Maximizing Rewards

The PDF version of “I Will Teach You to Be Rich” champions a strategic approach to credit card usage, moving beyond simply avoiding debt. Ramit Sethi advocates for leveraging rewards – cash back, travel points, or miles – to essentially get paid for your everyday spending. However, this hinges on responsible usage and always paying your balance in full each month.

The guide details how to select cards that align with your spending habits. For example, if you spend heavily on travel, a travel rewards card is ideal. The PDF emphasizes avoiding annual fees if the rewards don’t outweigh the cost. It also stresses automating payments to prevent late fees and maintain a good credit score.

Furthermore, the book advises against applying for too many cards simultaneously, as this can negatively impact your credit. The core principle is to treat credit cards as powerful financial tools, not as free money.

Investment Accounts: Brokerage and Retirement

The “I Will Teach You to Be Rich” PDF details a two-pronged approach to investment accounts: brokerage accounts for flexible investing and retirement accounts for long-term security. Ramit Sethi stresses the importance of opening both types, tailored to your financial goals and timeline.

For retirement, the guide advocates maximizing contributions to tax-advantaged accounts like 401(k)s and IRAs. The PDF explains the benefits of each, considering factors like employer matching and tax deductions. Brokerage accounts, conversely, offer liquidity and freedom to invest in a wider range of assets.

The book emphasizes automating investments – setting up regular contributions to both account types – to remove emotional decision-making. It also highlights the importance of choosing a low-cost brokerage, minimizing fees that erode returns over time. This systematic approach is central to building long-term wealth.

Investing Basics: Asset Allocation

The “I Will Teach You to Be Rich” PDF dedicates significant attention to asset allocation – strategically dividing your investments among different asset classes like stocks, bonds, and real estate. Ramit Sethi argues this is far more crucial than stock picking, emphasizing a long-term, diversified approach.

The guide doesn’t prescribe a single asset allocation, instead advocating for a personalized strategy based on your risk tolerance, time horizon, and financial goals. It explains the historical performance of various asset classes and how they behave in different market conditions.

Sethi champions the use of low-cost index funds to achieve broad diversification efficiently. The PDF details how to construct a portfolio using these funds, ensuring exposure to a wide range of companies and sectors. This foundational principle is key to building wealth sustainably.

The Importance of Low-Cost Index Funds

“I Will Teach You to Be Rich,” as detailed in its PDF version, strongly advocates for low-cost index funds as the cornerstone of a successful investment strategy. Ramit Sethi argues that attempting to “beat the market” through active stock picking is largely futile and often results in lower returns due to fees and emotional decision-making.

The PDF explains how index funds mirror the performance of a specific market index, like the S&P 500 or the NASDAQ 100, offering instant diversification at a minimal cost. Sethi highlights the detrimental impact of even seemingly small expense ratios over the long term.

Furthermore, the guide suggests considering funds like the Motilal Oswal NASDAQ 100 ETF for diversification beyond domestic markets, providing exposure to leading global companies. Prioritizing low fees allows more of your investment returns to stay in your pocket, compounding over time.

Diversification Beyond Domestic Markets

The “I Will Teach You to Be Rich” guide, accessible in PDF format, emphasizes the critical role of diversification, extending beyond just domestic investments. Ramit Sethi cautions against putting all your eggs in one basket – specifically, the Indian market – due to inherent risks and potential for limited growth.

The PDF details how diversifying internationally can smooth out portfolio volatility and capture opportunities in rapidly growing economies. A recommended strategy involves utilizing funds that provide exposure to global indices, such as the Motilal Oswal NASDAQ 100 ETF, offering access to top US technology companies.

This approach mitigates country-specific risks and allows investors to participate in broader global economic trends. The guide stresses that while understanding the Indian financial landscape is important, a truly robust portfolio requires a global perspective, as outlined within the PDF’s comprehensive framework.

Motilal Oswal NASDAQ 100 ETF: A Case Study

As detailed in the “I Will Teach You to Be Rich” resources, including the PDF version, the Motilal Oswal NASDAQ 100 ETF serves as a practical case study for international diversification. This ETF allows Indian investors to gain exposure to the 100 largest non-financial companies listed on the NASDAQ stock exchange.

The PDF highlights its benefits: providing access to leading global technology firms like Apple, Microsoft, and Amazon, which may not be readily available through domestic investment options. This strategy reduces reliance solely on the Indian market and taps into the growth potential of the US economy.

The guide explains how this ETF can be integrated into a broader portfolio, aligning with the principles of asset allocation and risk management. It’s presented as a relatively low-cost and efficient way to diversify, as discussed within the comprehensive financial plan outlined in the PDF.

Debt Management: Prioritization and Strategies

The “I Will Teach You to Be Rich” guide, accessible in PDF format, emphasizes a strategic approach to debt management. It advocates prioritizing debts based on interest rates, rather than simply focusing on the smallest balance. This is crucial for minimizing overall interest paid and accelerating debt freedom.

The PDF details two primary methods: the Snowball method (paying off smallest debts first for psychological wins) and the Avalanche method (tackling highest-interest debts first for financial efficiency). While the Snowball offers motivation, the guide leans towards the Avalanche method for optimal savings.

Furthermore, the PDF encourages negotiating lower interest rates with creditors. It stresses the importance of understanding your credit score and utilizing it as leverage. Effective debt management, as presented, is a cornerstone of building a solid financial foundation, freeing up resources for investing and achieving long-term goals.

Negotiating Lower Interest Rates

The “I Will Teach You to Be Rich” resource, available as a PDF, highlights negotiating lower interest rates as a powerful, often overlooked, debt management tactic. It’s presented not as an aggressive confrontation, but as a logical conversation with creditors;

The PDF stresses preparation is key. Knowing your credit score – and being able to demonstrate a history of responsible payments – provides significant leverage. Researching competitor rates allows you to present a concrete alternative, showing your creditor you’re prepared to move your business elsewhere.

The guide suggests framing the negotiation as a request for loyalty, emphasizing your long-term relationship with the creditor; Even a small reduction in interest can save substantial money over time. This proactive approach, detailed in the PDF, empowers you to take control of your finances and reduce debt faster.

The Snowball vs. Avalanche Method

“I Will Teach You to Be Rich”, accessible as a PDF, addresses debt repayment strategies, specifically contrasting the Snowball and Avalanche methods. The Snowball method prioritizes debts with the smallest balances, providing quick psychological wins and motivation, regardless of interest rates.

Conversely, the Avalanche method, detailed within the PDF, focuses on tackling debts with the highest interest rates first, minimizing overall interest paid. While potentially slower to show initial progress, it’s mathematically the most efficient approach.

The PDF doesn’t definitively endorse one method over the other, acknowledging individual preferences play a crucial role. It encourages readers to choose the strategy that best aligns with their personality and keeps them consistently motivated. Understanding both approaches, as outlined in the resource, allows for informed financial decision-making and accelerated debt freedom.

EPF vs. PPF: A Comparative Analysis (Indian Context)

While “I Will Teach You to Be Rich” doesn’t directly detail Indian-specific investment options in its core PDF, discussions surrounding its principles within the Indian financial landscape frequently compare Employee Provident Fund (EPF) and Public Provident Fund (PPF).

EPF, typically linked to employment, often receives preference due to potentially higher returns than PPF, though this can fluctuate. The PDF’s emphasis on maximizing investments translates to prioritizing options offering the best long-term growth.

PPF offers tax benefits and a guaranteed return, but may be less lucrative than a maximized EPF contribution. Adapting the book’s principles to India involves understanding these nuances and leveraging available tax-advantaged schemes. Maximizing EPF contributions, aligning with the book’s core philosophy, is often recommended for superior returns within the Indian context.

Maximizing EPF Contributions

Drawing from the principles in “I Will Teach You to Be Rich” – often found in PDF format – maximizing your Employee Provident Fund (EPF) contributions is a cornerstone of building long-term wealth, particularly within the Indian financial system.

The book’s core tenet of automating finances directly applies here. Increase your EPF contribution percentage beyond the default, if your employer allows, to consistently invest more. This aligns with the book’s emphasis on “paying yourself first.”

Furthermore, explore voluntary contributions to EPF (VPF) to further boost your savings. This proactive approach, mirroring the book’s advice on conscious spending and investment, ensures you’re leveraging a potentially high-return, tax-advantaged vehicle for financial security. Prioritizing EPF aligns with the goal of building a robust financial foundation.

Tax Implications of EPF and PPF

Understanding the tax benefits of both Employee Provident Fund (EPF) and Public Provident Fund (PPF) is crucial, aligning with the financial optimization principles detailed in resources like “I Will Teach You to Be Rich” (available in PDF format). Both offer tax advantages, but their structures differ.

EPF contributions often qualify for tax deductions under Section 80C, and the interest earned is typically tax-free, subject to certain limits. PPF also offers similar 80C deductions and tax-free interest. However, the book’s philosophy encourages a holistic view.

While both are beneficial, maximizing EPF is often recommended due to potentially higher returns and employer contributions. Carefully consider the tax implications of withdrawals from each, as rules can change. Proactive tax planning, a key element of sound financial management, is essential for wealth accumulation.

Conscious Spending Plan: Beyond Budgeting

“I Will Teach You to Be Rich” (available as a PDF download) advocates for a Conscious Spending Plan, a more effective approach than traditional budgeting. This method, detailed within the book’s 82-109 pages, focuses on aligning spending with your values and long-term goals, rather than restrictive limitations.

Instead of meticulously tracking every expense, the plan prioritizes identifying what truly matters to you. Allocate funds to these areas guilt-free, and automatically invest the remainder. This system, accessible through various formats like EPUB and MOBI, shifts the focus from deprivation to intentionality.

The core idea is to automate your finances, ensuring savings and investments happen before you have a chance to spend. This powerful strategy, outlined in the book, breaks down money flows and empowers you to build wealth without constant financial stress.

Tracking Expenses Effectively

While “I Will Teach You to Be Rich” (found in PDF, EPUB, and audiobook formats) moves beyond strict budgeting, understanding where your money goes is still crucial. The book doesn’t advocate for obsessive tracking, but rather for a strategic overview of your financial landscape.

The 82-109 page guide suggests focusing on identifying your “guilty pleasures” – the expenses you enjoy but might not realize are significant. This isn’t about eliminating them entirely, but about being aware of their impact and making conscious choices.

The book emphasizes automating savings and investments first, then analyzing remaining spending. This approach, detailed in the comprehensive resource, allows you to see where adjustments can be made without feeling deprived. It’s about gaining control and aligning your spending with your values, not simply cutting back.

Identifying and Eliminating Unnecessary Spending

“I Will Teach You to Be Rich” (available as a PDF, alongside EPUB and audiobook versions) doesn’t promote austerity, but rather a “Conscious Spending Plan.” This means identifying expenses that don’t align with your values or long-term goals – not just cutting costs randomly.

The 82-109 page resource encourages a review of automated payments and subscriptions. Often, these recurring charges add up without providing significant value. Canceling unused services is a quick win.

The book advocates for a focus on big wins, rather than nickel-and-diming. Negotiating bills, optimizing insurance, and reducing major expenses have a greater impact than eliminating small purchases. It’s about strategic cuts, not deprivation. The core principle is to free up funds for the things you truly enjoy and your financial future;

Long-Term Wealth Building Strategies

“I Will Teach You to Be Rich” (found in PDF, EPUB, and audiobook formats) emphasizes that consistent, automated investing is key to long-term wealth. The 82-109 page guide doesn’t focus on “get rich quick” schemes, but on building a solid financial foundation.

The book advocates for maximizing contributions to tax-advantaged accounts, like retirement funds. Diversification is also crucial, extending beyond domestic markets. Funds like the Motilal Oswal NASDAQ 100 ETF are suggested for exposure to international opportunities.

Furthermore, the resource stresses the importance of understanding the mechanics of global finance and adapting principles to your specific financial landscape. It’s about creating a system that works for you, consistently building wealth over time through strategic investment and mindful spending.

Real Estate Investment Considerations

While “I Will Teach You to Be Rich” (available as a PDF, alongside EPUB and audiobook versions) doesn’t deeply delve into real estate, the core principles apply. The 82-109 page guide champions a systematic approach to finances, which extends to property investment.

Before diving into real estate, the book’s philosophy encourages a thorough understanding of your overall financial situation – automating savings, managing debt, and establishing a conscious spending plan. This foundation is vital before taking on significant investments like property.

The guide’s emphasis on understanding financial flows and hidden mechanics is crucial when evaluating real estate; Consider factors beyond potential rental income, like property taxes, maintenance, and potential vacancies. A disciplined, informed approach, mirroring the book’s teachings, is paramount for success.

The Dhando Investor Approach (Indian Perspective)

Considering the American focus of “I Will Teach You to Be Rich” (found in PDF, EPUB, and audiobook formats), adapting its principles to the Indian context is key. The Dhando Investor, authored by an Indian author, offers a complementary perspective specifically tailored to the Indian financial landscape.

“Dhando” translates to entrepreneurial spirit, emphasizing buying businesses at a discount. This aligns with the core book’s focus on maximizing returns. However, applying this to stock selection requires understanding Indian market nuances.

The 82-109 page guide’s principles of automation and conscious spending remain universally relevant. Combine this with the Dhando Investor’s value-focused approach, and diversify beyond domestic markets using funds like the Motilal Oswal NASDAQ 100 ETF, creating a robust Indian portfolio.

Adapting the Principles to the Indian Financial Landscape

While “I Will Teach You to Be Rich” (available as a PDF, alongside EPUB and audiobook versions) provides a strong foundation, direct application to India requires adjustments. The differing tax laws and investment options necessitate a tailored strategy.

Prioritize maximizing EPF contributions over PPF, potentially benefiting from higher returns. Understand the tax implications of both, crucial for long-term wealth building. Explore liquid or arbitrage funds as alternatives to fixed deposits, seeking better post-tax yields.

The book’s emphasis on automating finances translates well, utilizing Indian banking systems. Conscious spending plans remain effective, but must account for local costs. Diversification, including international exposure via funds like the Motilal Oswal NASDAQ 100 ETF, is vital for a resilient portfolio.

Navigating Indian Tax Laws

Successfully implementing the principles from resources like “I Will Teach You to Be Rich” (found in PDF, EPUB, and audiobook formats) within India demands a firm grasp of its tax regulations. Understanding these laws is paramount for maximizing investment returns and minimizing liabilities.

Carefully consider the tax implications of EPF and PPF contributions and withdrawals. Capital gains tax applies to investments, influencing asset allocation decisions. Explore tax-saving investment options beyond the standard deductions.

Tax-efficient investing is crucial; utilize available deductions and exemptions. Staying updated on changes to Indian tax laws is essential, as they frequently evolve. Consulting a qualified tax advisor is recommended for personalized guidance, ensuring compliance and optimizing your financial strategy.

Resources for Indian Investors

Building wealth, inspired by guides like “I Will Teach You to Be Rich” (available as a PDF download and in other formats), requires leveraging resources tailored to the Indian financial landscape. The Dhando Investor offers valuable insights into value investing within the Indian context.

For diversifying beyond India, explore funds like the Motilal Oswal NASDAQ 100 ETF. Online platforms provide access to investment options and financial tools. Financial blogs and websites offer educational content and market analysis.

Consider seeking advice from qualified financial advisors specializing in Indian investments. Utilize resources from the SEBI (Securities and Exchange Board of India) for regulatory information. Remember to critically evaluate information and adapt strategies to your individual circumstances.

solar panel installation diagram pdf

Navigating the transition to solar power begins with understanding the installation process; readily available diagrams and PDF guides offer crucial step-by-step instructions for homeowners and installers alike.

Comprehensive resources, like those detailing commercial and industrial installations, emphasize proper connections between components – batteries, panels, grid, generation sources, and loads – for optimal performance.

Furthermore, guides highlight the importance of mechanical design, wind load considerations, and adherence to building regulations, ensuring a safe and efficient photovoltaic (PV) system installation.

Detailed manuals and online resources, including YouTube tutorials, provide valuable insights into system monitoring, troubleshooting, and regulatory compliance, empowering users throughout the process.

Benefits of Solar Energy

Embracing solar energy offers a multitude of advantages, extending far beyond simply reducing electricity bills. The shift towards photovoltaic (PV) systems, guided by detailed solar panel installation diagrams and PDF manuals, unlocks significant economic and environmental benefits for homeowners and businesses.

Financially, solar installations provide long-term cost savings, shielding consumers from fluctuating energy prices and potentially generating income through net metering programs. Access to resources like step-by-step guides empowers informed decision-making, optimizing system performance and return on investment.

Environmentally, solar power is a clean, renewable energy source, drastically reducing reliance on fossil fuels and minimizing carbon emissions. This contributes to a healthier planet and a more sustainable future. Understanding system components, as illustrated in installation guides, ensures responsible energy production.

Moreover, solar energy enhances energy independence, lessening vulnerability to grid outages and promoting self-sufficiency. The availability of comprehensive documentation, including commercial installation manuals, fosters confidence and facilitates successful implementation.

Ultimately, investing in solar is an investment in a brighter, cleaner, and more secure energy future.

Understanding Solar Panel Systems

Solar panel systems are comprised of interconnected components working harmoniously to convert sunlight into usable electricity. A crucial first step in comprehending these systems is utilizing a detailed solar panel installation diagram or PDF guide, which visually breaks down the process.

These diagrams typically illustrate the flow of energy from the photovoltaic (PV) modules – the panels themselves – through the inverter, which converts DC electricity to AC. Understanding the role of each component, as outlined in installation manuals, is paramount.

Furthermore, systems often include mounting hardware for secure roof attachment, and wiring for connecting panels to the inverter and ultimately, to the grid or load center. Commercial installation guides emphasize proper connections for optimal performance.

Key considerations include system size, panel orientation, shading analysis, and adherence to local building codes. Resources like BRE digests provide guidance on mechanical installation and wind load calculations, ensuring system longevity.

Ultimately, a clear understanding of system architecture, facilitated by visual aids, is essential for successful installation and operation.

Essential Components of a Solar Panel System

Detailed solar panel installation diagrams and PDF guides clearly illustrate the vital parts: panels, inverters, and mounting hardware, ensuring a complete system understanding.

Solar Panels (Photovoltaic Modules)

Photovoltaic (PV) modules, commonly known as solar panels, are the fundamental building blocks of any solar energy system, and solar panel installation diagrams in PDF format meticulously detail their placement and connection.

These diagrams showcase how panels convert sunlight directly into direct current (DC) electricity, emphasizing the importance of proper orientation and tilt angles for maximizing energy production.

Installation guides often feature schematics illustrating series and parallel wiring configurations, crucial for achieving the desired voltage and current output. Understanding these configurations, as presented in the diagrams, is paramount for efficient system performance.

Furthermore, the PDFs highlight the importance of selecting panels with appropriate voltage and power ratings, compatible with the chosen inverter and overall system design. They also address considerations like shading and temperature effects on panel efficiency, providing guidance for optimal placement to mitigate these factors.

Detailed specifications, often included within the diagrams, outline the panel’s electrical characteristics, dimensions, and warranty information, ensuring informed decision-making during the installation process.

Inverters (String, Microinverters, Power Optimizers)

Inverters are critical components transforming the DC electricity generated by solar panels into alternating current (AC) electricity usable by homes and businesses; solar panel installation diagrams in PDF format illustrate their integration.

These diagrams differentiate between various inverter types – string inverters, microinverters, and power optimizers – detailing their respective advantages and disadvantages. String inverters, the most common, connect to a series of panels, while microinverters attach to individual panels.

PDF guides emphasize the importance of matching inverter capacity to the solar array’s output, preventing clipping and maximizing energy harvest. Wiring schematics clearly demonstrate DC-to-AC conversion and grid connection procedures.

Furthermore, diagrams highlight safety features like ground fault protection and anti-islanding mechanisms, crucial for preventing hazards and ensuring grid stability. They also illustrate the role of power optimizers in mitigating shading effects and maximizing individual panel performance.

Detailed specifications within the diagrams outline inverter efficiency, voltage ranges, and communication capabilities, aiding in informed selection and proper installation.

Mounting Hardware

Securely attaching solar panels to rooftops or ground mounts requires robust mounting hardware, meticulously detailed in solar panel installation diagrams available as PDF documents. These diagrams showcase various mounting systems tailored to different roof types – pitched, flat, and tile.

They illustrate the use of rails, clamps, flashing, and standoff mounts, emphasizing proper waterproofing techniques to prevent leaks. PDF guides highlight the importance of wind load calculations and adherence to local building codes, ensuring structural integrity.

Detailed schematics demonstrate the correct sequence for installing mounting components, including anchoring to rafters or trusses. Diagrams also depict ground-mounted systems, showcasing concrete foundations and racking structures.

Furthermore, they specify appropriate hardware materials – aluminum, stainless steel – to withstand environmental conditions and prevent corrosion. Correct torque specifications for bolts and screws are crucial, as shown in the diagrams.

Comprehensive guides also address considerations for snow loads and seismic activity, ensuring long-term system reliability and safety.

Safety Precautions During Installation

Detailed solar panel installation diagrams in PDF format emphasize electrical and roof safety; proper grounding, PPE, and fall protection are paramount during every phase.

Electrical Safety

Crucially, solar panel installation diagrams and accompanying PDF guides consistently prioritize electrical safety, stressing the importance of disconnecting power sources before commencing work.

These resources detail proper grounding techniques to mitigate shock hazards, emphasizing the need for qualified personnel to handle all electrical connections and wiring.

Specifically, manuals like those for Sol-Ark systems warn against exceeding MPPT voltage limits (550V) and highlight the significance of correctly installing Current Transformers (CTs) to avoid inaccurate readings.

Furthermore, they underscore the necessity of adhering to local electrical codes and utilizing appropriate personal protective equipment (PPE), including insulated gloves and safety glasses.

Alarm states, as detailed in system documentation, must be promptly investigated using the alarms menu, and any damaged wiring or components should be immediately replaced to prevent potential hazards.

Always remember that improper electrical work can lead to severe injury or fire, making adherence to safety protocols non-negotiable.

Roof Safety

Solar panel installation diagrams and PDF guides frequently emphasize roof safety as paramount, detailing precautions to prevent falls – a leading cause of injury during installations.

Guides, such as those referencing BRE Digests 489 and 495, highlight the importance of assessing roof structural integrity before mounting any equipment, ensuring it can bear the added weight.

Proper fall protection equipment, including harnesses, lifelines, and guardrails, is consistently recommended and often mandated by safety regulations.

Installers should be trained in safe roof access techniques, including ladder safety and proper footwear, and avoid working in adverse weather conditions like high winds or rain.

Careful consideration must be given to the roof’s pitch and material, as these factors influence the choice of mounting hardware and installation procedures.

Regular inspections of the roof and mounting system are crucial to identify and address any potential hazards, ensuring long-term safety and system reliability.

Pre-Installation Assessment

Detailed diagrams and PDF guides stress thorough site surveys, including shading analysis and roof condition assessments, to optimize system performance and longevity.

These evaluations determine panel placement, identify potential obstructions, and ensure the roof’s structural integrity supports the solar array’s weight.

Site Survey and Shading Analysis

A comprehensive site survey, often visually represented in diagrams within installation PDF guides, is the foundational step before any solar panel installation. This assessment meticulously evaluates the property’s solar resource potential.

Crucially, shading analysis identifies obstructions – trees, buildings, chimneys – that could diminish sunlight reaching the panels, impacting energy production. Tools and techniques range from visual inspections to specialized solar pathfinder devices and software modeling.

Detailed diagrams illustrate the sun’s path throughout the year, pinpointing periods of shading and allowing for strategic panel placement to maximize sunlight exposure. Understanding shading patterns is vital for accurate system sizing and performance predictions.

Furthermore, the survey documents roof orientation, tilt, and available space, informing the optimal array configuration. Accurate data collection during this phase directly translates to a more efficient and cost-effective solar energy system.

Proper analysis ensures long-term energy yield and return on investment.

Roof Condition Assessment

Prior to solar panel installation, a thorough roof condition assessment is paramount, often detailed within installation PDF guides and accompanying diagrams. This evaluation determines the roof’s structural integrity and suitability for supporting the added weight of the solar array.

Inspectors meticulously check for existing damage – leaks, rot, weakened shingles – and assess the remaining lifespan of the roofing material. BRE Digests, referenced in photovoltaic installation guides, provide guidance on wind load considerations and mechanical installation best practices.

Addressing any pre-existing issues is crucial; repairing or replacing a roof after panel installation is significantly more costly and complex. Diagrams often illustrate proper flashing techniques to prevent water intrusion around mounting hardware.

The assessment considers roof type (asphalt shingles, tile, metal) as different materials require specific mounting solutions. A structurally sound roof ensures the long-term safety and performance of the solar energy system, protecting your investment.

Ultimately, a solid foundation is key.

Detailed Installation Steps

Following a diagram or PDF guide, mounting systems are installed first, then panels are placed and connected, and finally, the inverter is installed with precise wiring.

Mounting System Installation

Crucially, the mounting system installation, often detailed in a solar panel installation diagram PDF, forms the foundation for a secure and long-lasting solar array. This phase begins with a thorough assessment of the roof’s structural integrity, ensuring it can bear the added weight of the panels and mounting hardware.

Next, the chosen mounting hardware – rails, brackets, and flashing – are carefully installed, adhering to manufacturer specifications and local building codes; Proper flashing is paramount to prevent water intrusion and potential roof damage. Diagrams often illustrate correct attachment points and torque settings for optimal stability.

Furthermore, BRE Digests 489 and 495 provide guidance on wind load calculations and mechanical installation best practices for roof-mounted systems. Ensuring the mounting system is level and securely fastened is vital for maximizing sunlight capture and withstanding environmental stresses. A well-installed mounting system guarantees the longevity and efficiency of the entire solar installation.

Solar Panel Placement and Connection

Following mounting system installation, precise solar panel placement and connection are critical, often visually guided by a solar panel installation diagram PDF. Panels are positioned according to the site survey, maximizing sunlight exposure and minimizing shading throughout the day.

Securely attaching the panels to the mounting rails is paramount, utilizing appropriate clamps and hardware. Diagrams typically illustrate correct panel orientation and spacing for optimal performance. Once mechanically secured, the electrical connections begin, linking panels in series or parallel configurations, depending on the system design.

Careful attention to polarity is essential to avoid damaging the panels or inverter. DC wiring is then routed from the panels to the inverter, utilizing weatherproof connectors and conduit. A step-by-step guide ensures correct wiring sequences, minimizing errors and maximizing energy production. Proper connections are vital for a safe and efficient system.

Inverter Installation and Wiring

The inverter, a central component, converts DC power from the panels to usable AC electricity; its installation and wiring are detailed in a solar panel installation diagram PDF. Secure mounting, often near the electrical service panel, is crucial, ensuring adequate ventilation to prevent overheating.

Wiring involves connecting the DC output from the solar panels to the inverter’s DC input terminals, strictly adhering to polarity. Subsequently, the AC output is connected to the home’s electrical panel, typically through a dedicated breaker. Diagrams emphasize proper grounding procedures for safety.

Commercial systems may utilize multiple inverters or advanced technologies like microinverters or power optimizers, each requiring specific wiring configurations. Careful attention to voltage and current ratings is vital. Following the PDF guide ensures correct connections and safe operation.

Electrical Connections and Wiring Diagrams

Detailed solar panel installation diagram PDFs illustrate DC wiring from panels to the inverter, and AC wiring connecting to the grid or load center, ensuring safety.

DC Wiring (Panel to Inverter)

Crucially, solar panel installation diagram PDFs meticulously detail DC wiring procedures, emphasizing the connection between photovoltaic (PV) modules and the inverter. These diagrams illustrate proper polarity – positive to positive, negative to negative – to prevent damage and ensure efficient energy transfer.

Furthermore, they specify appropriate wire gauges based on current and distance, minimizing voltage drop and maximizing system performance. Diagrams often highlight the use of weatherproof connectors and conduit for outdoor runs, safeguarding against environmental factors.

Importantly, they demonstrate series and parallel configurations of panels, explaining how these affect voltage and current levels reaching the inverter. Safety is paramount; diagrams stress the need for DC disconnect switches for maintenance and emergency shutdowns. Monitoring MPPT voltages, ensuring they don’t exceed 550V, is also a key element shown in these guides.

Finally, these resources often include detailed schematics showing grounding requirements for DC circuits, protecting against electrical hazards and ensuring compliance with electrical codes.

AC Wiring (Inverter to Grid/Load Center)

Solar panel installation diagram PDFs provide comprehensive guidance on AC wiring, detailing the connection between the inverter and the electrical grid or load center. These diagrams emphasize adherence to local electrical codes and safety regulations throughout the process.

Crucially, they illustrate the use of dedicated circuit breakers sized appropriately for the inverter’s output, protecting against overcurrents. Diagrams often showcase the necessity of grounding the inverter and AC disconnect switch for safety and proper operation.

Furthermore, they depict the wiring pathway, often requiring conduit for protection, and highlight the importance of labeling all components clearly. Monitoring power flow using CT sensors (HM, LD) is often illustrated, noting that opposing values indicate incorrect installation.

Detailed schematics show how to connect the inverter to the load center, ensuring proper phase alignment and voltage compatibility. Finally, these resources stress the importance of professional inspection and approval before energizing the system.

System Monitoring and Performance

Solar panel installation diagram PDFs often detail monitoring systems, explaining how to interpret data and troubleshoot common issues for optimal energy production.

Understanding HM and LD power measurements, alongside alarm states, is crucial for identifying and resolving performance discrepancies efficiently.

Understanding System Monitoring Data

Solar panel installation diagram PDFs frequently include sections dedicated to interpreting system monitoring data, a critical aspect of ensuring optimal performance and identifying potential issues. These diagrams often illustrate how key metrics are displayed and analyzed, allowing users to quickly assess system health.

Specifically, understanding terms like ‘HM’ (power measured by external CT sensors – L1, L2 & L3) and ‘LD’ (power measured by the internal sensor on the GRID terminal – L1, L2 & L3) is vital. Discrepancies between HM and LD values can indicate incorrect CT installation, a common issue addressed in detailed manuals.

Furthermore, monitoring systems track MPPT voltages, with alarms triggered if these exceed 550V, safeguarding the inverter. Analyzing alarm menus and understanding the meaning of different alarm states is essential for proactive troubleshooting. Regular review of this data, guided by the installation diagram, empowers users to maximize energy yield and maintain system reliability.

Troubleshooting Common Issues

Solar panel installation diagram PDFs often dedicate sections to troubleshooting, recognizing that even with careful installation, issues can arise. These guides typically begin with a systematic approach, referencing alarm states and error codes displayed on the inverter or monitoring system.

For instance, a “Red Alarm” state, as highlighted in commercial installation manuals, prompts users to consult the alarms menu for specific details. Common problems include incorrect CT sensor installation, indicated by opposing Grid or HM values, and exceeding MPPT voltage limits (above 550V).

The diagrams themselves aid in identifying wiring errors or component failures. By visually tracing connections and comparing them to the schematic, installers can quickly pinpoint the source of the problem. Resources like YouTube tutorials supplement these PDFs, offering visual guidance for resolving frequently encountered issues, ensuring system uptime and efficiency.

Regulatory Compliance and Permits

Solar panel installation diagram PDFs rarely detail specific permitting processes, but implicitly emphasize the need for adherence to local regulations. These diagrams showcase system configurations that must comply with electrical codes and building standards, often requiring inspections at various stages.

Guides referencing industry experience, like the updated Photovoltaics in Buildings guide, reflect evolving regulations and best practices. While the mechanical design isn’t always within the scope of the PDF, compliance with wind load and mechanical installation standards (BRE Digests 489 & 495) is crucial.

Successful installations necessitate obtaining necessary permits before commencing work. Understanding local authority requirements, often found separately from the installation diagrams, is paramount to avoid fines and ensure a legally compliant, safe, and fully operational solar energy system.

beckett price guide 2024

Beckett Price Guide 2024: A Comprehensive Overview

Beckett’s 2024 guides offer extensive checklists and pricing for baseball, basketball, football, and hockey cards, spanning from vintage sets to
modern releases.

These resources, available in print and digital formats, remain vital for collectors seeking accurate valuations and cataloging tools within the hobby.

The 2024 Beckett Price Guide represents the latest iteration of the hobby’s most recognized and relied-upon valuation resource. For over three decades, Beckett Media has diligently compiled comprehensive checklists and pricing data, covering a vast spectrum of sports cards.

This year’s guide continues that tradition, offering collectors a detailed overview of the market, encompassing baseball, basketball, football, and hockey. Whether you’re a seasoned veteran or a newcomer to the hobby, the 2024 guide provides essential tools for accurately assessing card values and building a well-informed collection.

It’s a crucial starting point for understanding current trends and navigating the complexities of the sports card market.

The Importance of Price Guides in Card Collecting

Price guides, like the Beckett series, are fundamental to the sports card hobby, providing a standardized benchmark for valuation. While eBay sold listings increasingly influence actual transaction prices, guides offer a foundational understanding of a card’s potential worth.

They aid in informed buying, selling, and trading decisions, preventing undervaluation or overpayment. Beyond monetary value, price guides assist in cataloging collections and identifying key cards within sets.

Even with the rise of online resources, Beckett remains a trusted source, particularly for establishing a baseline and understanding historical pricing trends within the market.

Understanding Beckett’s Valuation System

Beckett utilizes a comprehensive system, factoring in card condition, rarity, and player popularity to determine values, published annually in their price guides.

Grading Standards and Their Impact on Value

Beckett’s grading standards are paramount to a card’s assessed value, ranging from Mint (9.5-10) to Poor (1-1.5). A card’s condition significantly influences its price; even slight imperfections can drastically reduce worth.

Centering, corners, edges, and surface quality are meticulously evaluated. Higher grades command substantial premiums, especially for key rookies or scarce variations. Collectors often submit cards to professional grading services for authentication and objective assessment, impacting market value. Understanding these standards is crucial for both buyers and sellers navigating the 2024 market, as accurately graded cards fetch the highest prices.

Key Factors Influencing Card Prices

Several factors beyond grading dictate card prices in 2024. Player popularity, rookie status, and scarcity are primary drivers. Cards of iconic players like LeBron James or Michael Jordan consistently command higher values.

Limited-edition inserts and serial-numbered cards also increase desirability. Market trends, fueled by social media and collector demand, play a significant role. eBay sold listings now heavily influence pricing, often surpassing Beckett’s printed values. The condition of the card, set popularity, and even team affiliation contribute to overall market value, creating a dynamic pricing landscape.

2024 Baseball Card Price Trends

Beckett’s 2024 baseball guide details pricing for sets from 1867 onward, though eBay sold listings are increasingly the market standard for valuations.

The latest editions, like the 46th and 47th, provide comprehensive checklists and pricing information for collectors.

Most Valuable Baseball Cards of 2024

Determining the most valuable baseball cards in 2024 requires a nuanced approach, blending Beckett pricing with real-time market data from platforms like eBay. While Beckett provides a foundational price guide, especially for cataloging, current sales trends often dictate actual value.

Key factors include card condition, rarity, and player popularity. Vintage cards, particularly those from pre-1980 sets covered by the Vintage Online Price Guide (OPG), consistently command high prices. Modern cards of superstar players, like those featured in recent Beckett publications, also see significant value, though market fluctuations are common. Collectors should consult multiple sources for accurate assessments.

Rookie Card Hotlist: 2024 Prospects

Identifying “hot” rookie cards in 2024 involves tracking emerging talent and monitoring market response, supplementing Beckett’s price guide with real-time sales data. While Beckett offers initial valuations, eBay sold listings provide a crucial gauge of actual demand and pricing.

Prospects generating buzz often see rapid value increases. Collectors should focus on players with high potential and limited card availability. Beckett guides can help identify key rookies, but staying informed through sports news and online communities is essential for maximizing investment potential. Careful research is key to navigating this dynamic market.

2024 Football Card Price Trends

Beckett guides track football card values, but current market trends emphasize eBay sold listings for accurate pricing, especially for quarterbacks and key players.

Demand heavily influences values, making real-time data essential.

Top Football Cards to Watch in 2024

While Beckett provides a baseline, identifying top football cards in 2024 requires monitoring market activity beyond price guides. Rookie cards of highly-touted prospects consistently generate interest, and their values can fluctuate rapidly based on performance.

Quarterbacks, as always, command a premium, with cards of emerging stars and established players seeing significant demand. Limited-edition inserts and autographed cards also hold substantial value. Collectors should closely observe eBay sold listings to gauge current market prices and identify potential investment opportunities. The hobby is dynamic, and staying informed is crucial for maximizing returns.

Quarterback Premium: Impact on Card Values

Historically, quarterbacks consistently command the highest prices in the football card market, and 2024 continues this trend. This “quarterback premium” stems from their pivotal role and high visibility. Rookie cards of promising QBs, like those identified in prospect lists, experience rapid value increases with successful NFL debuts.

Even established stars see sustained demand, particularly for rare inserts and autographed cards. While Beckett provides pricing, real-time eBay sold listings often reflect the true market value, showcasing the premium collectors are willing to pay for elite quarterback memorabilia.

2024 Basketball Card Price Trends

Beckett guides track values for key players like LeBron James and Michael Jordan, alongside rising stars, reflecting the growing demand for modern basketball cards.

Prices are influenced by condition, rarity, and player performance.

LeBron James, Michael Jordan & Other Key Basketball Cards

Beckett price guides continue to be essential resources for tracking the values of iconic basketball cards, particularly those featuring LeBron James and Michael Jordan. These players consistently command premium prices, with early rookie cards and rare inserts achieving significant values.

Beyond these superstars, Beckett also monitors the market for other key players, including those from the current generation. Cards of rising stars and established veterans alike are meticulously cataloged and priced, providing collectors with a comprehensive overview of the basketball card market. The guides help determine fair market value based on condition and scarcity.

The Rise of Modern Basketball Card Values

Beckett price guides reflect a notable trend: the increasing value of modern basketball cards. Recent years have witnessed a surge in demand for cards from players like Ja Morant, Zion Williamson, and Luka Dončić, driving up prices across the board.

This phenomenon is fueled by increased hobby participation and the popularity of these players. Beckett diligently tracks sales data and adjusts valuations accordingly, providing collectors with up-to-date pricing information. The guides showcase how limited-edition inserts and rookie parallels are becoming highly sought-after investments.

Beyond Baseball, Football & Basketball

Beckett extends its pricing expertise to hockey and other sports, offering comprehensive coverage from 1867 through 1980 via the Vintage Online Price Guide.

Hockey Card Values in the 2024 Market

Beckett provides crucial resources for evaluating hockey card values, particularly for sets released between 1980 and the present day, through its Vintage Online Price Guide. This specialized database offers detailed checklists and pricing information, catering specifically to hockey collectors.

While pinpointing exact 2024 trends requires ongoing market analysis, the Vintage OPG serves as a foundational tool. Collectors can leverage this resource to understand historical pricing, identify key cards, and assess the potential worth of their hockey card collections. It’s important to supplement this with current eBay sold listings for the most up-to-date valuations.

The guide’s comprehensive coverage extends beyond major stars, encompassing a wide range of players and sets, making it invaluable for both seasoned collectors and those new to the hobby.

Other Sports Card Price Guides Offered by Beckett

Beckett doesn’t limit its valuation expertise to baseball, football, and basketball. The Vintage Online Price Guide (OPG) demonstrates their broad coverage, extending to hockey, auto racing, and various other sports card categories. This comprehensive database spans an impressive historical range, from cards dating back to 1867 through to 1980.

The OPG provides users with access to detailed checklists and pricing for these diverse sports, making it a one-stop resource for collectors across the hobby. While specific 2024 guides may focus on major sports, Beckett’s overall offerings cater to a wider spectrum of collecting interests.

This breadth of coverage solidifies Beckett’s position as a leading authority in sports card valuation.

Utilizing Online Resources & Alternatives to Beckett

eBay sold listings have emerged as a primary pricing tool, often surpassing Beckett values, while the Vintage Online Price Guide (OPG) offers historical data.

eBay Sold Listings as a Pricing Tool

Many collectors are now prioritizing eBay’s completed/sold listings as a more accurate reflection of current market values than relying solely on Beckett price guides; A Reddit discussion highlighted that achieving Beckett’s listed price can be challenging, emphasizing the real-world transactions on eBay.

This approach provides tangible data on what cards are actually selling for, factoring in condition and demand. While Beckett remains useful for cataloging and identifying players, eBay’s data offers a dynamic, up-to-date pricing benchmark. Utilizing this method allows for more informed buying and selling decisions in the evolving card collecting landscape.

Vintage Online Price Guide (OPG) Coverage

The Vintage Online Price Guide (OPG) distinguishes itself by offering comprehensive coverage of sports cards released between 1867 and 1980, encompassing baseball, basketball, football, hockey, and even auto racing cards. This specialized database caters to collectors focused on pre-1980 sets, a segment not always as thoroughly detailed in standard Beckett guides.

OPG’s strength lies in its depth of historical data, providing checklists and pricing for a wider range of vintage issues. For those specializing in older cards, it serves as a valuable complement—or alternative—to Beckett’s more modern-focused publications.

Beckett Price Guide Editions & Formats

Beckett offers guides in print and digital subscriptions, including specialized editions for baseball and multi-sport sets, catering to diverse collector preferences and budgets.

Choosing between formats depends on accessibility needs and desired features.

Comparing Different Beckett Price Guide Versions

Beckett releases annual price guides, with each edition reflecting the evolving card market. The 2024 guides, like the Baseball Card Price Guide #46 and the upcoming #47 for 2025, provide updated valuations based on recent sales data and market trends.

Older versions, such as #35, can still be useful for vintage cards (pre-1980), especially when cross-referenced with online resources like the Vintage Online Price Guide (OPG). However, relying solely on older guides for current pricing is discouraged. Collectors should prioritize the latest editions for accurate assessments of modern cards, recognizing that market values fluctuate significantly.

Digital subscriptions offer the advantage of frequent updates, surpassing the static nature of print editions.

Print vs. Digital Subscriptions: Which is Best?

Choosing between a print or digital Beckett subscription depends on individual preferences and collecting habits. Print guides offer a tactile experience and are ideal for offline browsing, providing a comprehensive overview at a glance. However, they quickly become outdated as card values shift.

Digital subscriptions provide real-time updates, ensuring access to the most current pricing information. This is particularly valuable for actively trading or selling cards. While a print guide might cost around $39.95, digital access offers dynamic value, reflecting the fast-paced nature of the hobby. Ultimately, a digital subscription is often the superior choice for serious collectors.

Future of Card Pricing & Beckett

Beckett adapts to the evolving hobby, with eBay sold listings increasingly influencing market values alongside traditional pricing guides, ensuring relevance in a dynamic landscape.

The Evolving Card Collecting Market

The card collecting market is undergoing a significant transformation, shifting away from sole reliance on printed price guides like Beckett. While Beckett remains a valuable cataloging tool, online platforms, particularly eBay’s sold listings, are now the primary determinants of actual card values.

This change reflects increased market transparency and real-time data availability. Collectors are increasingly leveraging recent sales data to understand current pricing trends. Despite this shift, Beckett continues to play a role, offering historical data and a structured framework for understanding the hobby. The future likely involves a hybrid approach, blending Beckett’s expertise with the immediacy of online marketplaces.

Beckett’s Role in the Modern Hobby

Beckett’s enduring presence in the card collecting world stems from its decades-long commitment to comprehensive checklists and pricing information. Though the market now heavily favors eBay sold listings for valuation, Beckett still provides a foundational structure for cataloging and understanding card values.

Many collectors utilize Beckett to gain insights into player popularity and relative card worth, even if final sale prices differ. The brand’s guides, available in both print and digital subscriptions, offer a historical perspective crucial for serious collectors. Beckett is adapting, recognizing the need to complement its traditional role with modern data analysis.